Mast well leaking

winever

Member
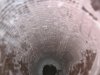
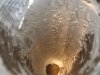
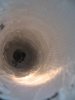
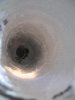
OK, did the air test, the mast well leaks, at the bottom, front edge. I looked on KB and didn't see anything. Any one ever fix that? Suggestions? I'm thinking a dowel just slightly larger than the mast, put some wetted glass on that and insert it. ????

Like I said suggestions welcomed. Thanks, cheers, Winever.
 
OK, did the air test, the mast well leaks, at the bottom, front edge. Suggestions?

Smearing stuff on the outside of a breech doesn't fix the crack and won't repair a weakened fracture area.

First I'd prop up the hull so I have gravity working in my favor.

If it's a hairline crack I'd swab it with laminating fiberglass resin mixed with finely milled glass fibers, using a brush fastened to a stick for reach. The thought is to have a mix with just a pinch of reinforcing fibers, but hardly enough to effect the viscosity so the resin will wick into the crack.

Once that's kicked, I'd apply a couple of layers of glass mat to add some bulk to the seal without being so thick it would impinge on the mast.

If the leak is something larger, like a cut from a mast missing an end cap or torqued by mast abuse (doubtful wind caused, but could be from motorboat wrenching a sail full or water, righting a turtle)..., I'd go in through my inspection port and wrap a couple of alternating layers of glass mat and lighter weight glass cloth around the mast tube base. Once that's kicked I'd do the inside of the tube as described in the first approach, only with this method I'd thicken the resin with more glass fiber to fill any void. I'd also top it with a couple of layers of mat.

A spritz of PVA to let the last layer kick to a finish followed by a little light sanding if anything protrudes that the mast would catch on.

.
 
I did the mickey-mouse repair route last summer on a similar crack, and it bought me a season at least. We'll see if it holds for another season until the inevitable needs to be done - i.e. cut a hole in the deck and make a proper structural repair.

As for the crack, as you can see from the pictures below, I just cleaned it out, slightly widened the crack with a screwdriver, and then stuck a vacuum down there to get all the sand and crap out. Then I Marine-Tex'd it with one layer of fiberglass tape, and then another layer or two of the epoxy until the whole cylinder was covered (in theory, spreading out and around the stress load of the repair). Also, I used a paint stick to get the Marine-Tex down in there; on the initial glop, I put the Marine-Tex at the end of the stick, and then used the stick to s-q-u-e-e-z-e- the epoxy into the crack.

Sanding the hole smooth was the hardest part. I jimmy-rigged a mini barrel sander to a drill bit, and then tried that. That only work so-so. The best solution was to get this new fangled 3M sandpaper, and put it on a paint stick (see link below). That worked great. Wrap this special sandpaper around a paint stick, and then set it on an angle to get at the bottom of the hole. To get at the side of the hole, just slowly work the paint stick combo slowly around the sides of the hole. This new 3M sandpaper in question is like a sponge with sandpaper on it - it's extremely flexible.

Should you ever try this short term solution, before any repairs are made, first stick the mast back into the hole, and mark the mast at the location where the lip meets the mast. It'll be about 9" inches. I'm glad I did this as the Marine-Tex "glopped up" the bottom, and thus the mast looked like it was all the way down to the bottom, but it really was not. Subsequently, I knew the bottom "lipwell'" needed more sanding such as to allow the mast go all he way down the bottom of the hole.

Again, it was the mickey-mouse solution, but it bought me a season....

Here are some pictures of the process, and a link to that 3M flexible sandpaper.

Link: [ame="http://www.amazon.com/411-220-220-Grit-Flexible-Sandpaper/dp/B002VP6Q3W"]Amazon.com: 3m 411-220 220 Grit Flexible Sandpaper: Home Improvement[/ame]
 

Attachments

  • IMG_6194.jpg
    IMG_6194.jpg
    65.5 KB · Views: 54
  • IMG_6197.jpg
    IMG_6197.jpg
    61.2 KB · Views: 47
  • IMG_6199.jpg
    IMG_6199.jpg
    71.3 KB · Views: 52
  • IMG_6225.jpg
    IMG_6225.jpg
    26 KB · Views: 40
  • IMG_6226.jpg
    IMG_6226.jpg
    25.5 KB · Views: 48

Back
Top