CANADA Boat

NightSailor

Captain
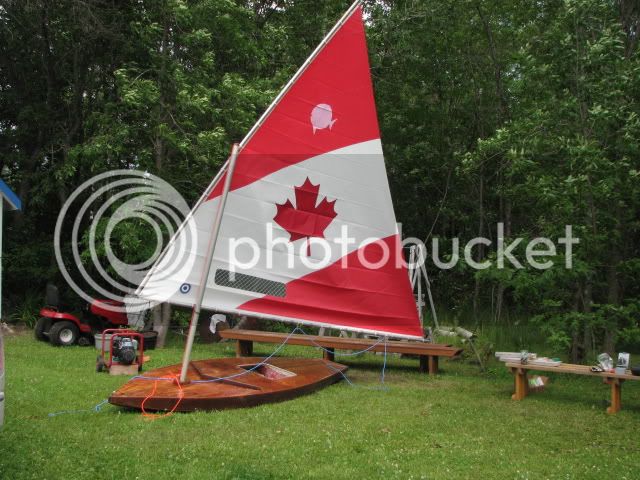
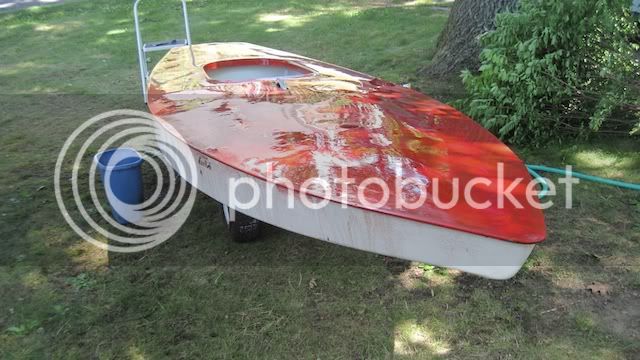
Here is my $150 project boat I have named Canada because of the Red and White Paint scheme. I was thinking about parting the boat out, and then decided to restore it, but I enjoy that, not that I need another Sunfish--this is #7. I have a Canadian friend I was going to give the boat to, but he has moved. So I will probably keep this one.

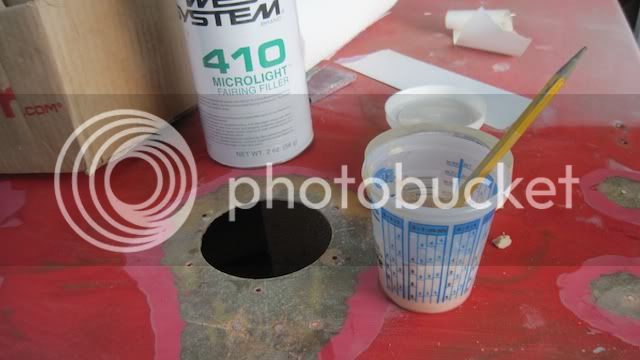
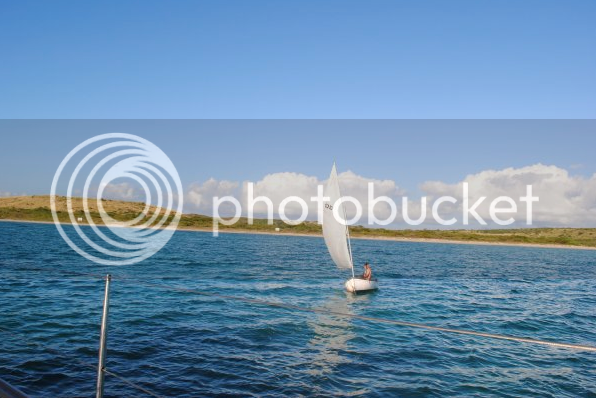
Here is the boat with a nearly new sail which came with a 1983 Sunfish I bought which has only been used a few times. I have given some thought to keeping this sail on this boat. I have pried the deck drain off and popped off the inspection port cover. You can see the tape I installed to keep out the rain.

Blackjack862-1.jpg


I have it's old sail, in ok shape, for sale on eBay at the moment and plan to put a brand new Canadian Maple Leaf sail on the boat.

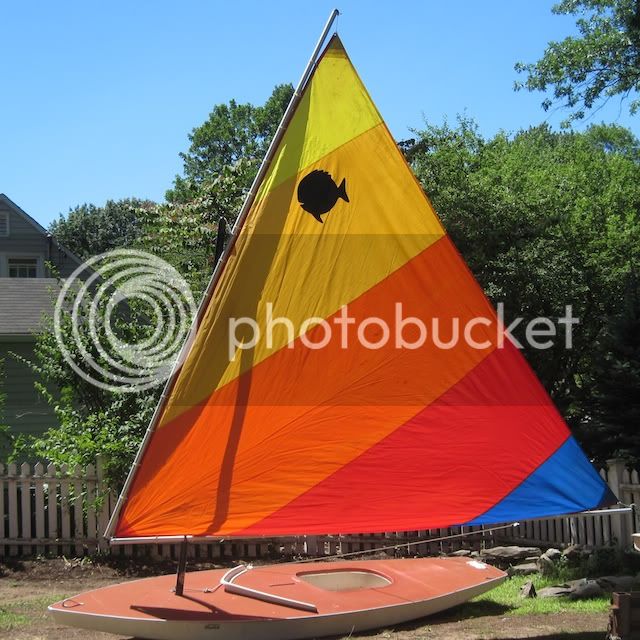
This is the sail I'm putting on this boat. This is not my boat. My CANADA boat is down two pictures.
MapleLeaf.jpg


Here is it [below] striped of deck hardware:

Canada876.jpg


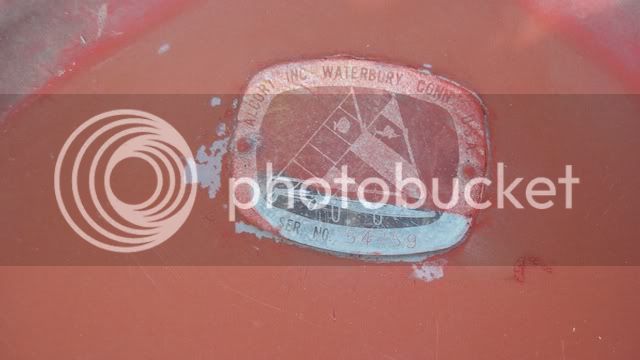
I need to look up the year it was made. Hull number 54,?59

Canada875.jpg


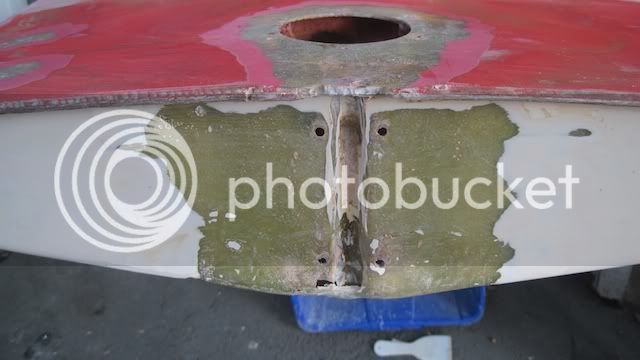
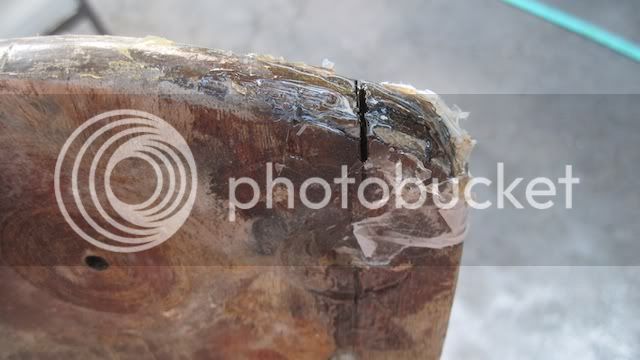
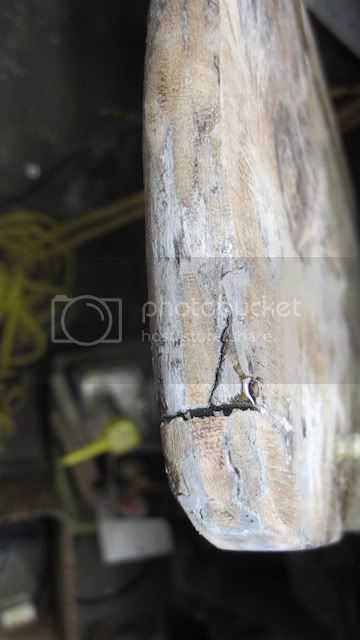
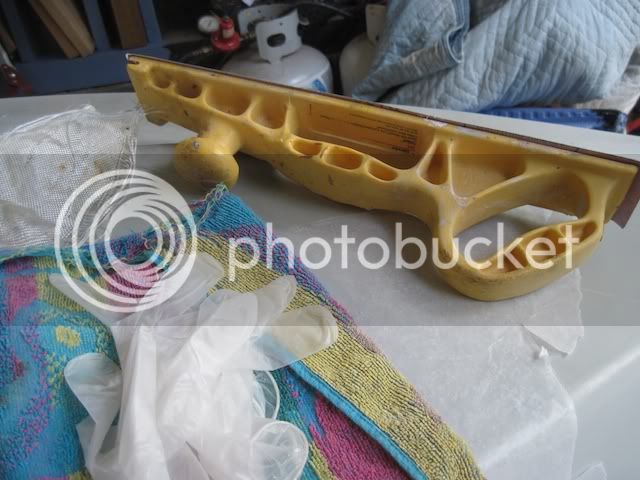
Serious Problems aft around the rudder replacement [below]. Not as bad as my other project SCUD, a 1968 Sunfish. My experience with scud will make this go fast. There is a pile of unsanded gelcoat that I'll have to sand flat to make the transom look good. Time to dig out my long board again. I suspect this is where the leaks were.

The entire deck flange looks good. I have not installed an inspection port to check out the daggerboard. I need to pressure test the boat at some point. I drained quite a bit of water out of the boat. I have an AC powered fan that I plan to bolt onto the forward end of the cockpit and pump air through the boat. It is getting hot and soon it will be a good time to dry out the boat in our sunny backyard.

Canada874.jpg


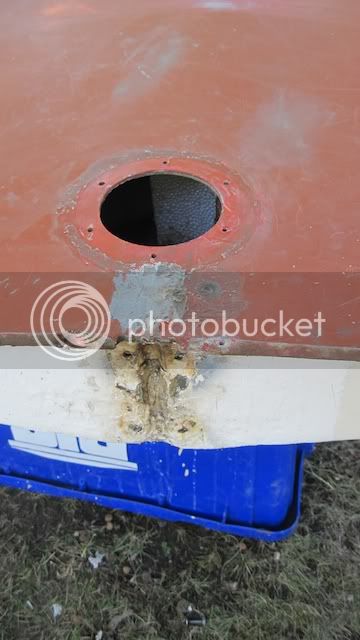
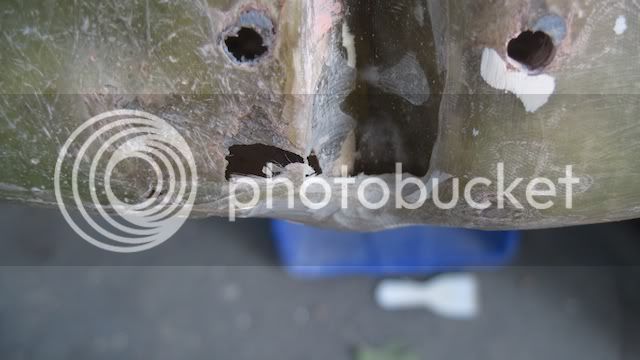
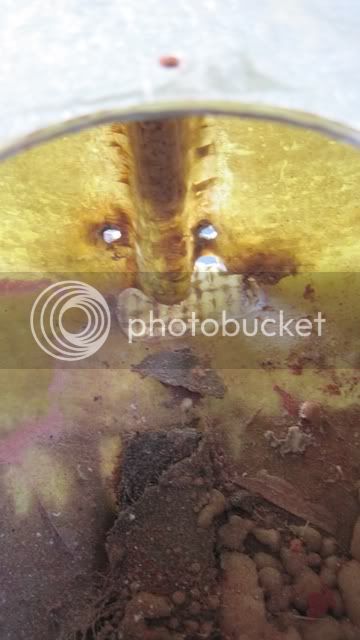
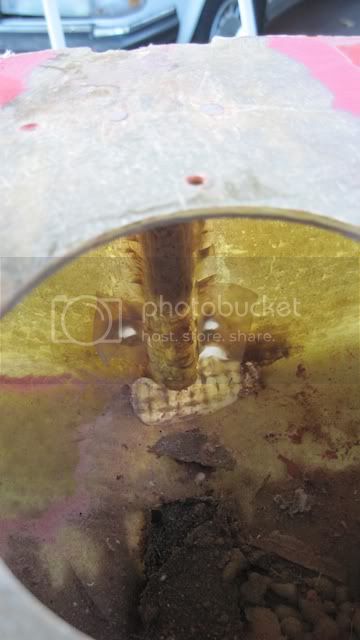
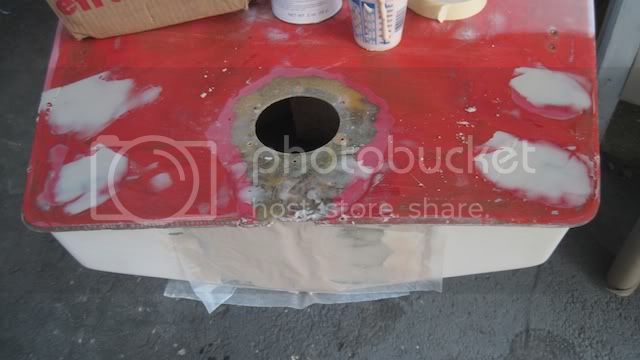
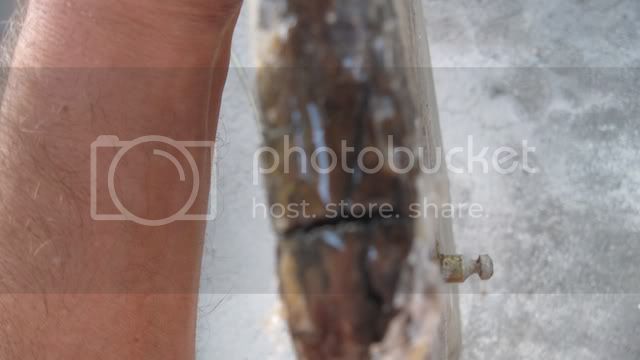
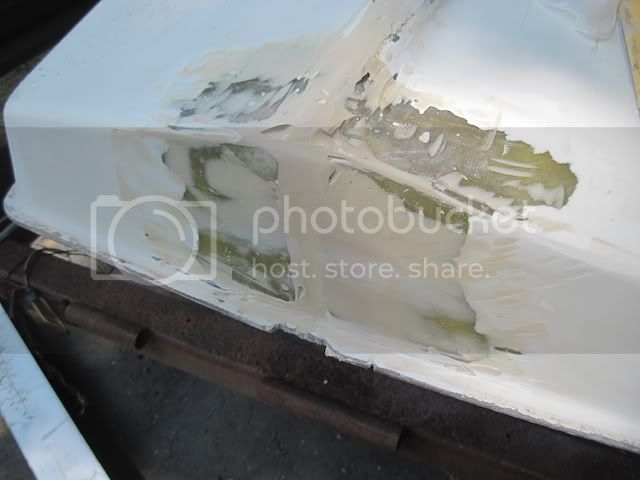
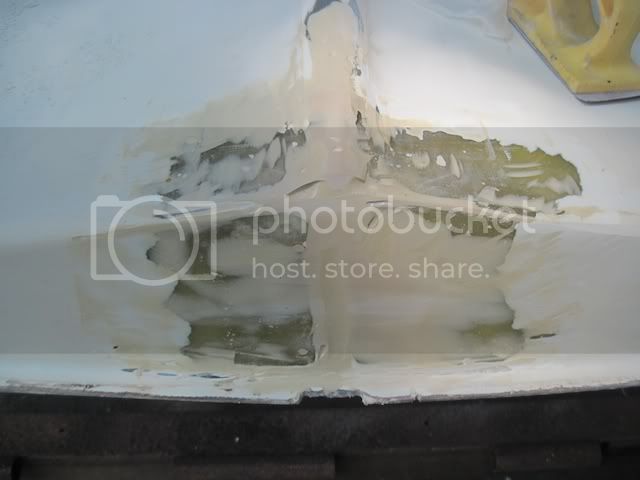
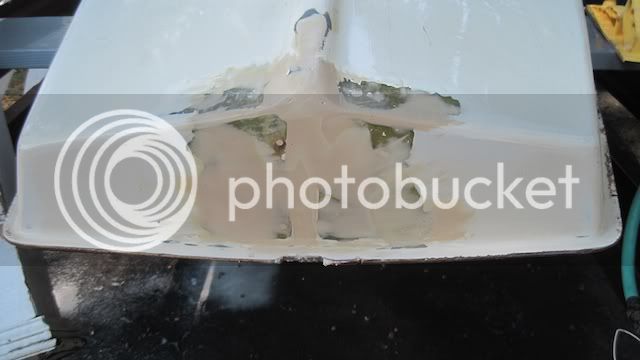
What the heck did they do back here [below]? Something was installed here. I found various areas covered with silicone [shown]. I have since scraped and then ground these areas down in preparation for their patches.

Canada873.jpg


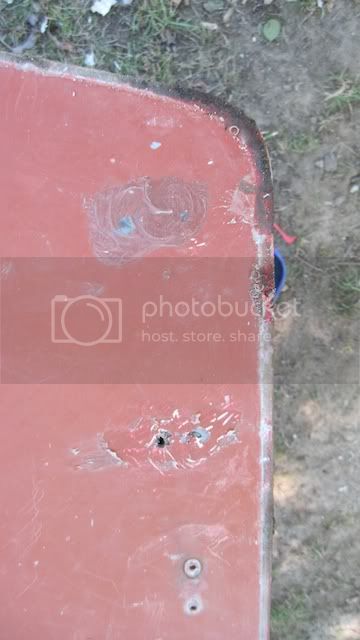
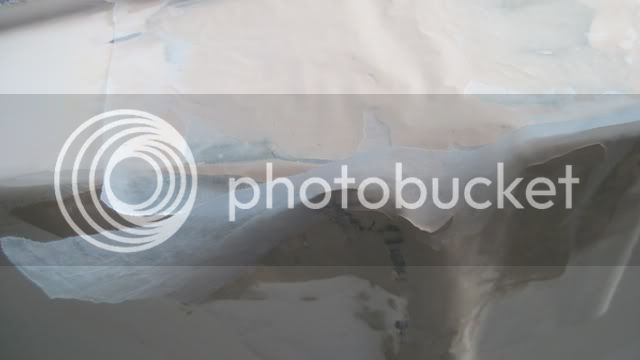
This looks deceptively good. It is not. Freshly washed after sanding, the deck is mostly in good shape. I don't think I'll be able to bring the gel coat back to life. More than likely I'll paint it this same color. This photo does show what I hope to achieve. The white coaming is in good shape. The rub rails are off and being polished at the moment. I think this work will go fast once I get the backing plate for the transom install and the deck access port glassed over and faired.

Canada872.jpg


I will need to order some vinyl graphics for the name, and perhaps I can find Maple Leaf decals to put on the bows.
 
I found out why this boat was so wet. I suspected the problem was with the rudder conversion--I was right. What I could not have guessed was that the conversion was done because of damage caused by the old style rudder and what I'll guess was a hard grounding. There was a poorly done patch with many voids that was allowing water into the boat. See the bottom left area of the exposed fiberglass below.
Canada877.jpg


Here is a closeup of the area. As you can see I ground down most of this area. There is more work to be done on the bottom also. I ground down much of that, but I'll have to flip the boat over to finish that portion of the repair. Note the different textures of the fiberglass the material on the left is the normal random mat layup for a Sunfish. The portion on the right has too much resin and it is fiberglass cloth. The area under the channel is part of the "old" repair also. I left that so I would have something to glass onto. I was careful to fill these pockets with filler ensuring there was no air inside before filling the other areas.
Canada878.jpg


Below is a view looking at the inside of the boat. Now that the gelcoat has been ground off, you can clearly see the area that was damaged. That bottom roving will need to be filled a bit and reinforced with a few layers of fibgerglass cloth. I have some stitched mat that will work, and some really thin epoxy mix that will wet out thick cloth like stitched mat. The nice thing about that sort of work is that gravity will be helping me. I will need to find something to weight it down once in place; perhaps some zip lock plastic bags filled with something heavy like grass seed will be enough to ensure a tight bond...
Canada879.jpg

Same shot showing masking tape on the inside, used to seal it off for the next step, epoxy filler. I am still amazed at the size of this hole. It is about 3 square inches!
Canada880.jpg


Here is what I'm using for filler. 410 is easy to sand. I thought about using 403 for more strength, but the fiberglass cloth I'll be using will give it strength. I just want to fill the void of the damaged area and the channel for the old style rudder. This pictures shows some of the patches I've installed that have been ground down smooth ready for fairing material (410).
Canada881.jpg


Below is a view of the transom after the filler has been troweled in place and a layer of wax paper used to hold it from dripping. I mixed this very thick, but it will still sag. A second piece of wax paper covers the bottom. Once this has set up and is sanded flat exposing the fiberglass laminate on either side, I'll lay some fiberglass cloth across this area, which will make it pretty strong.

The inside will get some reinforcing also in preparation for the backing plate that will be glued inside. These backing plates do not lie flush unless either side of the channel is built up. I'll be using my Dremel tool to prep the inside, perhaps fairing it a bit if needed, and giving it a sandwich of another layer or two of cloth across the whole area, followed by about 6 layers of cloth to build up each side of the notch. That will enable me to firmly bed the backing plate tight against the inner transom without any voids I'll need to Gelcoat the outside first though because bedding it tight will require four bolts to single it up tight together.

Standard boat building practice for installing winches in modern boats is to bed a plate of aluminum as core surrounded by fiberglass. Then the holes are drilled and the aluminum is tapped (threaded). This allows such hardware to be removed at any time without needing access to the inside of the boat. I might encapsulate the backing plate and try that method myself. It would be nice to be able to remove a rudder plate and re-bed it without opening up the boat. I intend to seal off the old 4" inspection port so there will be no access to the inside of this boat after this is done.
Canada882.jpg


The bottom edge looked equally bad. I put some filler on here just so that, once sanded down to bare glass, I have something flat to bond to.
Canada883.jpg


The below picture shows the filler I used to cover the glass patches install over the four cracked areas aft. I'm still wondering what the heck these were for. Any ideas? I used a small piece of stiched mat for each patch. Stitched Mat is equivalent to a layer of mat and a layer of heavy cloth.
Canada884.jpg


The rudder was much like the boat. Used and abused. This top portion of the rudder was split along the axis of the rudder and also athwart it. I was able to clamp both sides of the rudder after filling the middle with un-thickened epoxy. I used a C-Clamp for the more difficult portion that was split wide, and a couple of hand clamps for the more flexible area which pulled it all together fairly well. A vise would have done a better job, but I don't have one.

This picture shows the split athwartships on the rudder. Not much I can do about this except fill it with thickened epoxy. For now this needs to be dressed up to remove the wax paper I used to contain the mess. I am thinking about cutting into the cheeks on either side and laying a layer of fiberglass cloth around the split for a permanent fix.

Canada887.jpg


This shows the remaining split from the top.
Canada888.jpg


After sanding the remaining cracks are clearly visible.The two cracks I clamped pulled together nicely. one is the S-shaped dark line on the bottom right. The other is above it and more obvious.
Canada890.jpg


The last job of the day was to mix up some 403 and fill this last crack as well as another finer crack on the bottom of the rudder. That is done and drying at the moment. Here is what 403 looks like. I mixed it up pretty thick. I'm not quite done mixing here. 403 is a powder of glass fibers. Very hard to sand, but a very strong glue. I use a grinder to clean this stuff up, while the 410, peanut butter looking filler, is very easy to sand, but not as strong.

Canada891.jpg


Despite the setback of this bigger than expected repair, I'm finding it easier to work with than the hull/deck split on Dixie. On that other boat the split is longer than I thought and it will take some patient Dremel tool work to prep that for glassing. I have a few interesting ideas for that repair--stay tuned.

I'm still kicking around the idea of renewing the gelcoat. I hate gelcoat work. It is a PITA. I have plenty of epoxy primer and one small can or Interlux Perfection would do three coats of the deck and make it so shiny, I'll go blind. On the other hand. I have a spray gun and it would be cool to try and make the Gelcoat work. The only thing is, if it doesn't come out well, it is a long time sanding to fix it. Still mulling that one over...
 
I've been unable to work on my boats much. Our next door neighbor was upset to learn that we asked him to remove his fence from our property. It was 7 feet into our land. As a reprisal they have turned me into building code enforcement for exceeding the limit of one boat and one trailer left in the open. I've spent the last few weeks rushing to get two trailers with Sunfishes removed from the backyard. I have another one, DIXIE in the garage, and CANADA is on a third trailer in the driveway. They seem to think that working on a boat is a commercial activity. People stop by all the time asking me to sell them a boat, and always they want me to give them away. I have never sold a Sunfish. Oh well.

So yesterday, I restarted work on CANADA and DIXIE. This thread will talk about CANADA. I ground out four little divits in the hull of CANADA about where you would find a daggerboard dolly's bumper stops. It definitely had a homemade dolly without rubber bumpers to cause that damage. I probably could have filled them up with filler and it would have been fine, but I decided to put a little glass into those. I spent a few minutes long boarding them today but most of my effort was put elsewhere.

Here is what I used for grinding. This is my more abrasive grinder--I find it gives me a bit more control than my other grinder. This one has two 32 grit disks attached. The extra disk adds stiffness. These are older used disks. I like them that way, because it is like using 60 grit disks. I did not want huge abrasiveness while doing fine detailed grinding.

Note my plastic wash basin used to hold my epoxy. I have one gallon of resin, and a pint of fast hardener, an extra pint of fast hardener, and a third pint of slow hardener. Also available at West Marine is clear hardener, for those who want wood grain to show through when glassing over wood.

DixieCrackRepair927.jpg


I also use a long board [yellow handle]. This works great for bigger boats. I find it less useful, but still very useful on smaller boats. It is slower but works for making surfaces flat, or for gentle curves.

DixieCrackRepair928.jpg


The problem on the transom was that it was repaired with a sloppy patch, that did not keep the water out, and it had some huge voids. I'm sure water was getting in here. My first filling was not enough. Fairing sometimes needs four or more applications to get something perfectly smooth. I try to put it on thick to reduce the number of times I need to apply fairing. This job got another fairing (Filler) application, and will probably need one more.

CanadaRepair922.jpg


Here is it after grinding and cleaning with solvent. I always wipe down the area I'm working on with solvent to remove an Amine Blush, wax, or dirt on the surface.

Another view face on. You can see there is a lot of filler in the bottom middle of the boat. I think the boat ran aground and the old rudder mount ripped a hole in the bottom. If you look closely you can see the cross hatching of the fiberglass cloth used. I don't think it needs any more cloth on this side. I've given some thought to adding one layer of cloth. Probably what I'll do is reinforce the inside, which is pretty ugly, and will need to be built up for bedding the backing plate anyway.

See the grinder gouges? You might think I was sloppy with the grinder--well sometimes I am. Not this time. Most of those were air bubbles from the past repair. I wanted to fill those, so the quickest way is to grind them out so they can be filled. Air pockets, even small ones can collect water. They also cause ugly gelcoat cracks.

Canada923.jpg


Here it is with layer 2 of fairing (filler) material. I put it on thick since I can sand this tan colored West Systems 410 easily. 410 is the thickener I use when I want something easy to sand. I mix it up until it is thicker than peanut butter. Thicker means it won't run so much. It also means I may not need a 3rd coat if I can sand it down smooth--not likely but worth a try. This is the prep work that determines how good it will look when finished. The transom is probably the least critical area on the boat to be fair. The bottom area though, where the old style rudder was attached could make a difference in reducing drag.

So I put on extra filler, and most of this will be sanded off. We shall see how smooth it looks after sanding tomorrow. Then I will be applying one layer of fiberglass cloth and fairing it again, following this I'll be grinding out the inside and patching that.

DixieCrackRepair921.jpg


By the way, I used four pumps of Epoxy and hardner and that was enough to do this job, and a slightly smaller job on DIXIE with material left over.
 
Ok, so you saw how ugly it looks with a pile of filler material on the transom. How could that ever look good? That is what I think every time I pile it on, and this is my second application of filler for this area. This time I had pretty good success. I will need a tiny application of filler to fill in a few air bubbles. Generally I'm happy with how it turned out.

Here is what it looked like before sanding.

DixieCrackRepair921.jpg


After sanding the second layer of fairing material off. The different layers show slightly different colors due to the amount of filler I added to the epoxy.

CANADA922.jpg


A few little air holes. These are believe it or not, some of the harders jobs. Sometimes it is very hard to get rid of these holes.
CANADA923-1.jpg


Close up of the transom area. Normally this is where the pin in the old style sunfish. I filled it in and rounded it off.
CANADA924.jpg


A few air pockets to be filled on the keel.
CANADA925.jpg


A tiny bit more sanding and I will apply my last layer of fairing, and then 'I'll start on gelcoating this, so I can flip it over. to start on the inside repairs.
 
Great work Nightsailor! Wish you lived closer so that I could learn your techniques. Looks like a lot of hard work and perseverance. I surmise that redoing these old boats mush hold a special place in your heart. Do you enjoy sailing these boats as much as you do repairing them? Peace Brother. :D
 
Great work Nightsailor! Wish you lived closer so that I could learn your techniques. Looks like a lot of hard work and perseverance. I surmise that redoing these old boats mush hold a special place in your heart. Do you enjoy sailing these boats as much as you do repairing them? Peace Brother. :D

I sail pretty often. So much so, that I'm burn out on day-time sailing. I prefer to sail at night to enjoy the stars and avoid all that nasty UV light. I get too much of it as it is. I lost one good sailing friend to Skin Cancer--what scares me about that is we were so much alike--I don't want to die like him.

Lately my sailing has been ocean and coastal passage-making. I've had my Etchells out a few times to test out my new spinnaker with friends. Sailing any kind of boat is great fun. My long range plan is to bring at least two Sunfishes on the deck of my 46' sloop for play toys for the Caribbean. I want to build some sort of frame over my cockpit to mount them.

I don't understand why people would go to some of the best sailing in the world, and then hang on a hook. Most of these harbors are so gorgeous--they are small boat heaven. Here is how I spent my last trip to the Caribbean [below]. This is an empty harbor on the SE end of Vieques which is just east of Puerto Rico. Few people anchor here. I call it Unexpoloded Ordinance Harbor. The real name is Bahia Salina Del Sur. It is full of unexploded Navy shells. But it has been a while since the Navy used it as a bombing range, and I'm not terribly worried--it doesn't stop me from going there. In any event, you never see small boats sailing here or in most of the fine harbors of the Caribbean. You rarely see boats anchored here because of the warning signs. In any event, there are many harbors like this that are perfect for recreational sailing. But no, people who charter in the Caribbean, are usually happy to sail or motor around in these plastic bleach bottle boats--and never enjoy the best part of sailing in the islands--and that is small boat sailing.

Screenshot2010-08-08at101448PM.png


I'm trying to stay on the subject. I've only been out on one of my Sunfishes once this year, early on, and I had one really fun 8 hour sail on a friends Sunfish last month near Edgartown. Next weekend I'll be sailing Sunfishes all day and I'll be bringing four with me to the beach.

The main reason I've been working on these Sunfishes, is people that know me have starting giving me these boats--word gets around. The last one I got was in such poor shape I stripped it and junked the hull. I don't want any more of these boats.

I've been working on boats in a big way for about 12 years, so I have gallons of epoxy, boxes of fiberglass cloth and tape, and all kinds of filler. Sunfishes are so easy to work on at home. While I enjoy working on boats, I get burnt out on it. It is really hard to grind fiberglass in an enclosed space. Environmental suits, pressurized breathing air, Air Conditioning, fans, dust containment systems, vacuums--plus the commute to the boat to work on it. That is a really pain to set up.

Working on a Sunfish with a fan for clean air, or a freeze breeze to blow the dust away is simple by comparison. Need a break? Step inside to Air Conditioning, cool drinks, and to play with the dogs, etc.

By the way, I'm getting a new dog. A Portuguese Water Dog. I'm looking forward to training her for water obedience work. I mean to find out if one of these dogs really can climb a rope. I'd really like her to be able to swim back to the boat, and climb aboard by herself.

Kokini1112.jpg
Kokini102.jpg
Kokini104.png
 

Back
Top