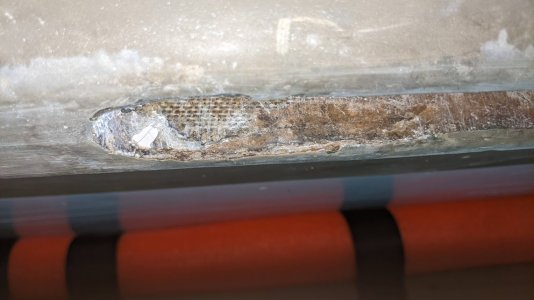
Another Leaky Daggerboard Trunk

b10alia

New Member
Had a moderate "the water's not that deep here" two weeks ago with the daggerboard. Noticed that there was more water in the hull than there had been after previous sails, although I looked after driving home in a downpour with no gaskets on the deck plates. I picked up probably 2-3 gallons from just the rain we've had this week based on what I took out this morning.

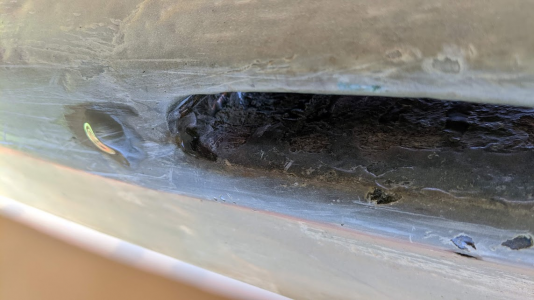
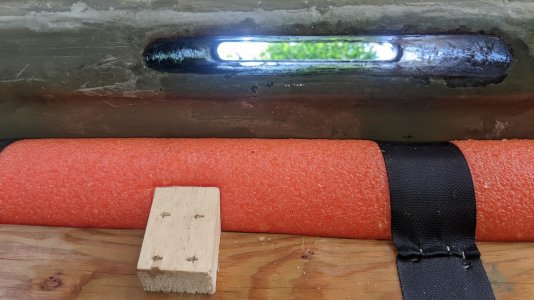
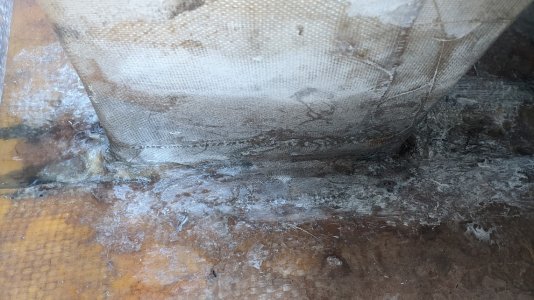
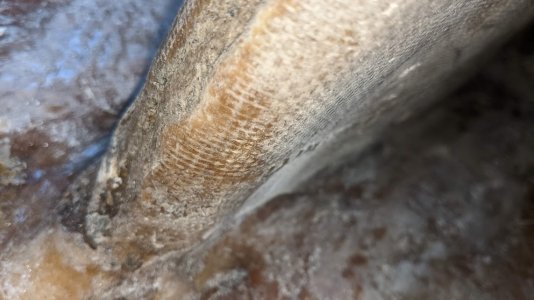
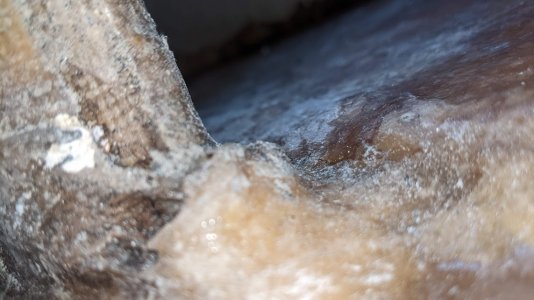
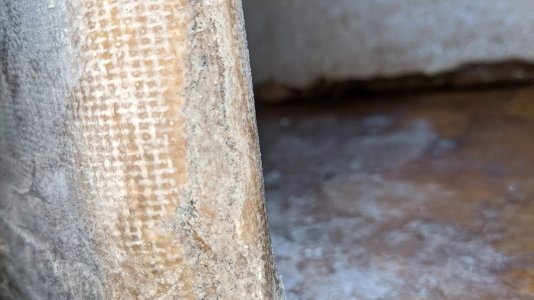
After coming back today, I had maybe 3 gallons on board for 3 hours sailing (about double the "pre smash" rate) and noticed water dripping down from the front and rear of the daggerboard trunk while I was strapping her on the trailer. Found a chunk of what looked like old epoxy in the bilge, although this has gone "somewhere else" on the drive home. There's a pretty good crack a couple inches up into the bottom aft of the daggerboard trunk.

I don't know what the specific history is with this boat but I get the sense the keel was heavily damaged before I got it, there was a lot of "stuff" in this area. I was 14 at the time and one of my friend's dads helped me do some of the work. We put epoxy (a thin layer) with something gray in it down the length of the keel, since this was obviously pretty bad, and the idea was to give some more scrape protection. I've been wrestling with leaks in the daggerboard trunk since, though. I've gotten it pretty reasonable, the last go was with a caulk gun of 5200 and I was impressed with the results... but hoped I'd never have to repair it. I did have to spring for a small can of the "5200 remover" stuff to deal with the transom drain plug earlier this year.

Also to note: the daggerboard has never gone up and down smoothly, it takes a good hard push to go all the way down and there's enough friction that it stays up in whatever position you put it in.

So this isn't a huge issue, maybe 1 1/2" of water either side of the trunk with the boat sitting flat after sailing for a few hours. For what I do now, it's borderline OK, although I'm planning a trip in a couple of weeks that might have the boat sitting at a dock or in the water for several days.

I don't want to rip the whole bottom of the boat apart, but I think I want to try and fix this. I've never "done fiberglass" although I get the concepts and that prep is most of it.

I'm thinking about some sort of epoxy although I know people scoff at this. More 5200 would be quick but I think the problem is beyond this. I already have inspection ports either side of the trunk, about centered on it.

Pictures:

Rear of trunk on trailer, about 15 minutes after pulling out:
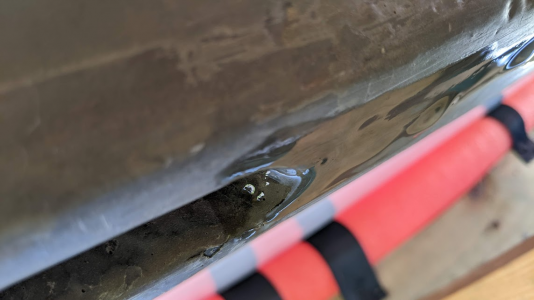
1690762213057.png
Front of trunk:
1690762277840.png
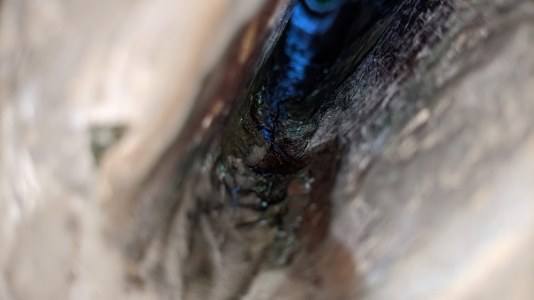
Inside trunk looking from deck, back edge
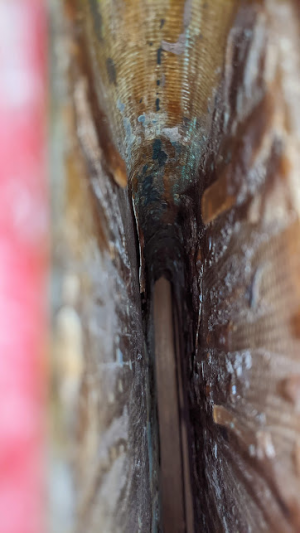
1690762531462.png
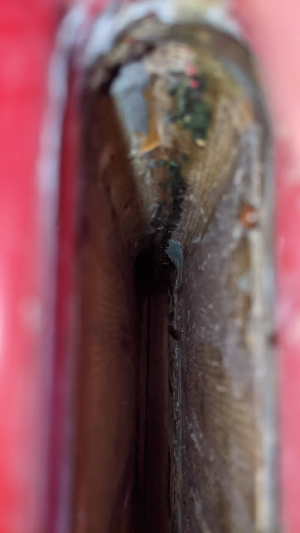
Back edge from underneath:
1690762730019.png
Front edge from top:
1690762584453.png
My 5200 repairs, port side and close-up of lower back:
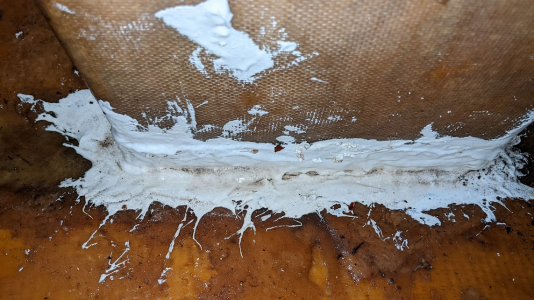
1690762816211.png
1690762866533.png
Old repairs to keel area forward of daggerboard trunk:
1690763004158.png


I want to fix this "better than 5200" but the goal here is: get it to stop leaking, or leak less, permanently; and be sailable in 2wk. Preferably get the daggerboard to work properly at the same time. Have to work around the old repairs to the extent possible, and keep costs reasonable (less than $100? ish? This is boat stuff after all...)

I have (limited) weeknights and next weekend to work on it. I have some access to West System epoxies from work although I have to pay for what I use (the pumps, mainly) and getting anything we don't have in stock (we're not a boat shop) will be a bit of a hassle on the bookkeeping end. Part of why I'm thinking about epoxies.
 
Understand how the leak test works and why it's needed. I think it will show me pretty much what I've already seen, hole/crack at the bottom of the daggerboard trunk where the water was coming out in the pictures above.

I've done the bubble check before and gotten giant bubbles at the trunk, not so much a specific indication of where. User technique plays a role I'm sure.

Assuming the crack pictured is the problem, and I verify with the bubble test, what would be a good product (i.e. permanent and functional, maybe not pretty) to apply here, given what I'm looking at in the surrounding area?
 
1) Your bubble test will be better with the Sunfish on its edge.

2) Find a 12- or 10-inch board and glue (or epoxy) sheets of 45-grit sandpaper to both sides. Add blister-packaging to raise the sandpaper to fit the trunk almost snugly. Have a friend operate the other end and "saw the high points" for a good clearance for your board. (Assuming the board is well varnished and not swollen or waterlogged).

3) Find other projects around the house that would benefit from extra epoxy--ready to use. You'll need gloves.

4) Your epoxy costs can be relegated to zero by mixing the epoxy to the catalyst at a ratio of 5:1. (Or the correct ratio for your brand). Stir.

(Pumps can skew the mixture with bubbles).

5) Secure a piece of plywood to cover the base of the daggerboard trunk. Allow 24 hours to allow your adhesive to set suitably. (Shoo-Goo doesn't work well with wood).

6) Pour your batch of ready-made epoxy into the top of the trunk. Roll the boat around and end to end. Remove the plywood, catch the excess in a tub, and go coat something else. ;)

Use lots of rags to wipe away drips.

Keep in mind, the damaged area could be higher than you think. (There's a "slosh" factor while sailing).

Although epoxy resin is technically a glue, it's a very strong glue. It should seal the smaller imperfections and blisters.
Applying a vacuum to the "breathing" hole could help in seeing where the leaks are. It may be necessary to repeat the procedure, but from the other end.
 
Keep spraying and wipe away excess as needed until you find the leaks. There is a lot of old junk in that trunk that needs to be filed away, we have a half round/flat rasp that we use, taped to a stick if needed. Globbing more adhesive over old repairs will not hold.

We'd get 2 caulk tubes of THIXO (Thickened Epoxy Adhesive) from Jamestown Distributors/TotalBoat and, 4 oz fiberglass cloth and do repairs from the inside of the boat. For chipped resin inside the trunk we'd get rid of the chips, sand the area and spread a layer of THIXO over the voids. Snad to shape.
 
I'm expecting the worst point is that visible crack and that hitting the rock opened it up. Video got me thinking about checking the bailer, I gooped this joint with 5200 and it's a new O-ring.

LVW:

I do not have enough willing friends to flip a 14' boat of any description end-over-end... The "two man saw" approach with the sandpaper is not something I had thought of, I was thinking "file on a stick" and how this could get messy the further I went up. This is just far enough up to be a pain, maybe right pain, to get at from the inside.

--

I was hoping to find "magic goo" to smear in that big crack, but I asked a friend offline who said (quote) "Needs fiberglass :( ". I guess I'll put that can of "5200 Begone" to work this week...
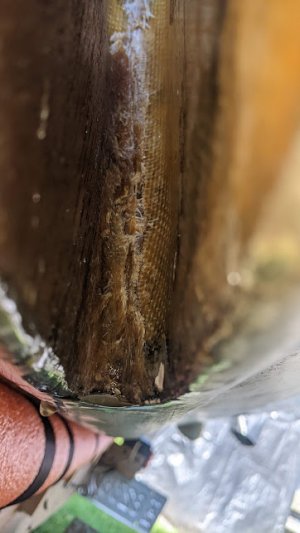
Daggerboard is heavily varnished and could use a refinish, although that's not the whole problem with it being stiff for sure.

Signal_charlie:

Will look into. With cloth, do you put it on both sides (i.e. THIXO spread out over damage-> new cloth -> THIXO spread out over new cloth), or just the interface and push the cloth into it? I probably want to go all the way around the trunk since the front leaks visibly, too.

Would you do THIXO all the way up to the deck to try and make the trunk stronger/more watertight? Most of me doubts this would do much unless I can see/identify a hole, part of me thinks there doesn't seem to be much resin in the glass on the trunk overall...

---
The main point is to stop the leak. I'm assuming the trunk cracked under the 5200, I should not assume and I will put the blowgun in the drain plug first to see; but I'm guessing this is the biggest problem given the old repairs and past history.
 
Managed to pull most of the 5200 off in one piece today by picking and peeling. Was poking around in the trunk with a paint stir stick and dislodged a bunch of the loose junk. Some will have to be cut out with a file/abrasives but a lot of it separated by just prodding with the stir stick. This all seems to be on top of the base fiberglass. I did find one area that sounds a little glassy, so I stopped prodding.

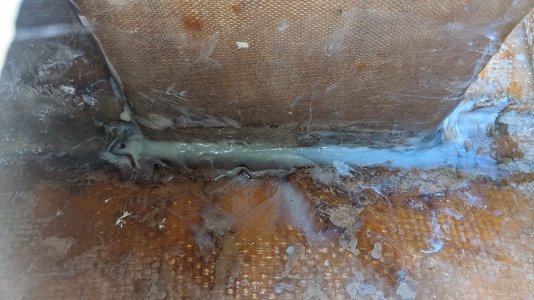
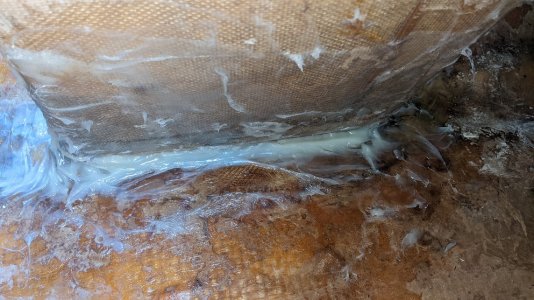
Lots of epoxy in the keel but I can see the rear crack from both sides now and I think a hole. Pulled off a lot of junk from the back:
1690934302064.png

1690934339047.png

Need to do some more cleaning over the next few days, but:
-Should I vee the crack? Thinking no with a single layer.
-What should I do about the epoxy on the keel, is there going to be a reaction with it, or just rough it up to lock with the Thixo?
-It's obviously wet in here, how dry do I need to get it? Would expect some water in the foam so it's likely to be humid inside even once I get the standing water.
 
As dry as possible. I'd use a hair dryer (if you have electricity there). Canvas or leather gloves will reduce the heat experienced. :eek:

Does anyone recognize the old patching material as Bondo? (They make a marine filler). Just how reactive/friendly Bondo is to epoxy (or polyester) resin is unknown to me.

'Wish I'd thought earlier to suggest using a pressure-washer to clean up the loose pieces inside the trunk. But dry-out would take some time. Every reference to use of pressure-washers on Sunfish has been favorable.
 
Made some progress this week.

The brownish stuff on the back of the trunk inside, I have no idea what it was, but the 5200 remover (think it's called DeBondIt) went after it well enough.

Tried the pressure washer on the loose stuff inside and it was too well-stuck at the bottom of the trunk to come off. It seemed to loosen things a little bit.

Spent most of today scraping out the inside of the trunk. Looked like some sort of epoxy with glass in it, and cloth in some areas. Port side wasn't too bad (took a long time but consistent progress) but the starboard side was very well-adhered (the remover wasn't doing anything to it), so I decided this might be better left alone.

Used a 10" half round rasp. A round rasp would be good for the ends, I only had a half-round file and it went very slowly, the file actually worked better as a pick. Daggerboard drops right through the hull under its own weight. Scuffed areas inside with 80 grit sandpaper and vacuumed.

Glass tomorrow, I guess. Here's where things are now:

Aft edge of trunk:
1691275602148.jpeg
Underneath looks straighter and the ends are more evenly round. Some of the epoxy chipped off the bottom although I'm not particularly worried:
1691275699100.jpeg
Port side of trunk:
1691275781652.jpeg
Crack, port, bottom:
1691275867947.jpeg
Starboard bottom:
1691275928503.jpeg
Starboard, up a little more:
1691275978238.jpeg
--

My thought is to get a couple spreaders (old gift cards or whatever), clean everything up with acetone, dispense Thixo onto spreader and apply on the clearly-damaged area first, try and get it somewhat smooth and covered.
(Pre)cut a piece of cloth to cover the crack (vertically? I'm almost thinking diagonal might work better with the old repairs), stick this into the existing Thixo and spread more into it until it looks to have penetrated.
Then go all around the trunk with the Thixo, spreading it out onto the bottom and into the joints/seams at the keel and about 1 1/2" up.
(Pre) cut another piece to wrap all the way around the trunk and wide enough to cover the entire crack on the aft end, and to extend down onto the hull (notch the "flange" in the cloth around the ends of the trunk so it sits flatter/doesn't wrinkle).
Spread more Thixo into this, then put a final layer over everything and extending out beyond the cloth.
Wait for it to dry, then leak check. If it still leaks from the trunk, try to spread more Thixo on (sparingly) from the inside? At that point, I would think I'd be screwed...

I'm concerned about the integrity of the joint between the hull and the trunk, particularly the area that's already damaged, since this will get bashed any time the daggerboard hits something (which happens). This has clearly been something previous owners have gone after, presumably unsuccessfully. That's the root of the "go all the way around" thought.

Questions:
-Have I gone far enough with the scraping if the daggerboard runs fine and I've gotten the loose stuff out, seeing that I'm trying to repair this from inside the hull?
-Is my plan valid enough that it's likely to work, or am I off the mark?
 
Might have a good'er.

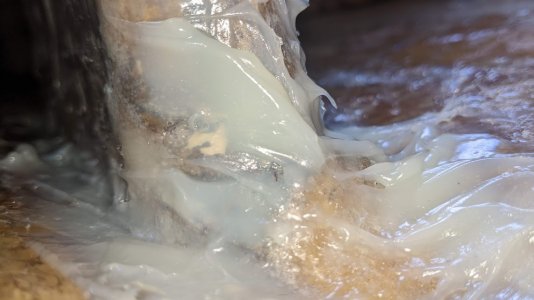
Put the Thixo on Sunday, it was not as big of a deal as I was making it out to be but still required some forethought.

Answering some wonders I had going in:

The best way I could describe what comes out of the end of the gun is petroleum jelly-- it's kind of slippery and wants to get all over everything instead of sticking to itself. It's not particularly easy to build big thickness with it, although I think that's not the point. It holds whatever shape it's left in and doesn't flatten out like other epoxies I've used (JB Weld). It spreads out onto cloth very nicely and you know when everything's covered because you have to try to get more to stick. I was pretty careful and didn't end up with that much of a mess, but you don't want to work it with your hands, the gloves (don't get this on your skin and WEAR GLASSES) will be so covered with the stuff that you won't be able to hold anything, and anything you touch will get coated with the Thixo. Still better than mixing stuff in cups. I used one tube and could probably have used less.

It wasn't a frantic hour and a half, but I was working as fast as was practical, and pre-planning what you're going to be doing helps a lot, until the plan inevitably starts to fray (it will).

Applying the glass was a mixed bag. The first piece went on easy because it was small, the bigger piece was not easy and I feel like I almost "lost it" a couple of times. It was hard to keep everything in place (the cloth will stick but slide in the Thixo) and I'm pretty sure I didn't get it exactly the way I planned (a lot of why I ended up spreading with my fingers, trying to flatten out the "flange" on the second piece). I spent about half an hour prepping the cloth and trying things "dry", which was worth it, but it's not easy once the Thixo is applied.

Working through the deck ports, even if they're in ideal spots like mine are, is tricky. I'm a 7/8 scale human and I'm well-used to working in confined spaces from my day job, but working with both hands in the port is very difficult. I was also working in my shadow on the starboard side and I would have done well with a headlamp, even though the sun was bright.

--

Put the blow gun in the drain port this afternoon stuffed with a paper towel and just enough pressure to get bubbles at the deck ports (which had no gaskets), maybe 15psi on a 1/4" line (actual pressure in the hull will be lower; it's a large, leaky volume since it's only stuffed with a paper towel, and the incoming flow is restricted). Put the (broken) gaskets back on the ports and sprayed the entire trunk/suspect area with soapy water. No developed bubbles, and I knew I had some pressure by the constant large bubbles from the deck ports. I also sprayed a couple smashed areas on top, and the bailer which did not appear to leak. Found a couple small leaks in/around the trim/joint at the stern.

I'm not an optimistic person and I immediately assume I did something wrong, although the logical half says "you didn't". She should at least be better than she was, at least I can't see holes and cracks through the trunk!

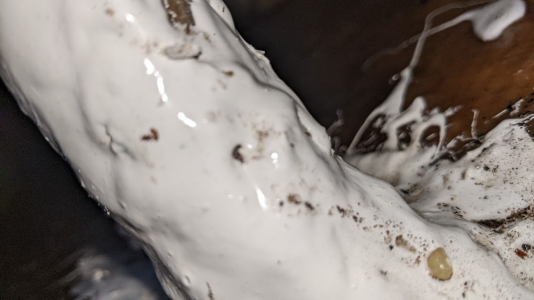
Pictures (these were taken a couple hours after application, shows how Thixo holds its shape):

Port side, half-neat:
1691454073063.jpeg
Starboard side, messy, finger marks, lousy cloth smoothing:
1691454120449.jpeg
Port side, bottom (messy):
1691454213856.jpeg
Damaged the bottom (of the hull) at the bottom of the trunk (cut into the glass on the bottom); I might go over this, but the area above is basically 1/2" of solid epoxy and doesn't appear to leak:
1691454339017.jpeg

I would give myself maybe 5/10 on quality of the repair, but if it doesn't leak, I don't really care what it looks like since there are uglier parts you can see. We'll see how long it lasts, I guess, but a 50 year old boat is a 50 year old boat.

One question: Do I need to protect the Thixo from water once it's hard? Supposed to rain hard tomorrow and we'll likely take some on through the deck ports. Everything was done by 1pm Sunday.

Will update once I take her out, but many thanks for the assistance and advice received.
 
Looks good, nice job. You can smooth THIXO a bit with a plastic spreader or a gloved finger or the end of a paint stick. Be careful when it dries for spikes of epoxy, they could be sharp.

THIXO will tack in 4 hours or so, fully cure in less than a day, so it will be fine. It can even be rained on directly and what doesn't wash off will cure, ask us how we know :)
 
Might have a good'er.

Put the Thixo on Sunday, it was not as big of a deal as I was making it out to be but still required some forethought.

Answering some wonders I had going in:

The best way I could describe what comes out of the end of the gun is petroleum jelly-- it's kind of slippery and wants to get all over everything instead of sticking to itself. It's not particularly easy to build big thickness with it, although I think that's not the point. It holds whatever shape it's left in and doesn't flatten out like other epoxies I've used (JB Weld). It spreads out onto cloth very nicely and you know when everything's covered because you have to try to get more to stick. I was pretty careful and didn't end up with that much of a mess, but you don't want to work it with your hands, the gloves (don't get this on your skin and WEAR GLASSES) will be so covered with the stuff that you won't be able to hold anything, and anything you touch will get coated with the Thixo. Still better than mixing stuff in cups. I used one tube and could probably have used less.

It wasn't a frantic hour and a half, but I was working as fast as was practical, and pre-planning what you're going to be doing helps a lot, until the plan inevitably starts to fray (it will).

Applying the glass was a mixed bag. The first piece went on easy because it was small, the bigger piece was not easy and I feel like I almost "lost it" a couple of times. It was hard to keep everything in place (the cloth will stick but slide in the Thixo) and I'm pretty sure I didn't get it exactly the way I planned (a lot of why I ended up spreading with my fingers, trying to flatten out the "flange" on the second piece). I spent about half an hour prepping the cloth and trying things "dry", which was worth it, but it's not easy once the Thixo is applied.

Working through the deck ports, even if they're in ideal spots like mine are, is tricky. I'm a 7/8 scale human and I'm well-used to working in confined spaces from my day job, but working with both hands in the port is very difficult. I was also working in my shadow on the starboard side and I would have done well with a headlamp, even though the sun was bright.

--

Put the blow gun in the drain port this afternoon stuffed with a paper towel and just enough pressure to get bubbles at the deck ports (which had no gaskets), maybe 15psi on a 1/4" line (actual pressure in the hull will be lower; it's a large, leaky volume since it's only stuffed with a paper towel, and the incoming flow is restricted). Put the (broken) gaskets back on the ports and sprayed the entire trunk/suspect area with soapy water. No developed bubbles, and I knew I had some pressure by the constant large bubbles from the deck ports. I also sprayed a couple smashed areas on top, and the bailer which did not appear to leak. Found a couple small leaks in/around the trim/joint at the stern.

I'm not an optimistic person and I immediately assume I did something wrong, although the logical half says "you didn't". She should at least be better than she was, at least I can't see holes and cracks through the trunk!

Pictures (these were taken a couple hours after application, shows how Thixo holds its shape):

Port side, half-neat:

Starboard side, messy, finger marks, lousy cloth smoothing:

Port side, bottom (messy):

Damaged the bottom (of the hull) at the bottom of the trunk (cut into the glass on the bottom); I might go over this, but the area above is basically 1/2" of solid epoxy and doesn't appear to leak:


I would give myself maybe 5/10 on quality of the repair, but if it doesn't leak, I don't really care what it looks like since there are uglier parts you can see. We'll see how long it lasts, I guess, but a 50 year old boat is a 50 year old boat.

One question: Do I need to protect the Thixo from water once it's hard? Supposed to rain hard tomorrow and we'll likely take some on through the deck ports. Everything was done by 1pm Sunday.

Will update once I take her out, but many thanks for the assistance and advice received.
Impressive!
 
If you have broken fiberglass you will not repair it using gunk. Any non structural patch, sealant needs to be removed and the area scuffed up before adding new glass and (epoxy) resin about two inches or more beyond the damage in all directions. The CB trunk is highly loaded and flexes a lot under way. Add in the inevitable impact from grounding. (I have grandchildren). Covering with flex sealants is a total waste. It looks like you have an access port. Use it to get tools in to clean up the mess. Try a Fine Multitool or its inexpensive clone from Harbor Freight. Perhaps a palm sander or DA sander will fit.
 
THIXO is pretty darn strong.

I'm relying on it (and a ring of battens) to hold both my halyard fairlead and cleat, which are co-joined on a section of foredeck.
 
You will have an opportunity to do this again. Fixed and built a lot of FRP, many boats. Good luck
 

Back
Top