Bonding Cockpit to hull

Cupcake

PaddleHand
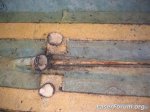
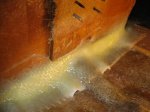
Anyone out there tried squirting any kind of foam bonding adhesive down through an inspection port to bond the cockpit and the hull together to prevent movement between hull and footwell/cockpit? I would like to add just one port rather than two and try to get epoxy/resin/cloth down in there.
thanks!
 
I did this repair a couple of weeks ago.
Take 2k epoxy resin. I highly recommend "West System" epoxy resin+hardener, but other brands could work too (I took "yacht care epoxy-bk" -> cheaper than the "West"-epoxy).
You could do it with inspection ports (the way I did it because I had to repair a crack also the inner sole of the cockpit), or without such.

Without inspection ports, you need to drill several holes exact in length in the center line of the cockpit floor. The cockpit floor is a sandwich-system of 2 fiberglass soles and a foam layer between those fiberglass layers - about 2 cm of total thickness. You need a big medical syringe and a small suitable "tube" (for instance, a piece of a suitable drinking straw taped strong to the syringe), that you need between the medical syringe and the place you want to glue at the center line stringer at the keel of the hull. This stringer often is only 2 cm thick. Not easy to locate from the outside, but exact measurement helps. You inject the epoxy via the tube by the syringe. You don't need much epoxy. After you have injected the resin, put some heavy weights on the cockpit floor until the resin is not dry. Later, close the holes with epoxy filler and use gelcoat for the finishing layer.

With inspection ports: no holes to drill in the center line of the cockpit. You paint the epoxy with a looooong paintbrush (such as one to paint heatings ) between the inner cockpit sole and the center line stringer. Again: After you have painted the resin, put some heavy weights on the cockpit floor until the resin is not dry.

More to this probably next week. I just have to manage a racing event at my club with "only" 63 Lasers a the starting line next Saturday.:rolleyes: :rolleyes: So, time is a rare good for me, at the moment...
BTW: I remember reports about ways to do such a repairs from "drLaser" at his old (now offline) website for Laserites. Perhaps another here could add the related links to those pages here, from archive.org, thanks.

Ciao
LooserLu
 
Lu:
I saw the Dr. Laser repair and spoke to someone who had done it. Super involved and IMHO, not necessary. If you look at the pic below you will see that the after cockpit bulkhead is bonded to the liner in three places - the drain and at each corner. unless there is evidence of severe sagging of the sole, I would create three filets between the hull and the bulkhead out of thickened epoxy and then layer over it with woven roven. The second pic shows the first one I did. I was overkill with the limber holes, and by the time I did the second one, I did the three separate bonds to allow more water/air flow under the sole. Both boats are used extensively during the summer and haven't missed a beat.
 

Attachments

  • Cockpit Drain Exposed.jpg
    Cockpit Drain Exposed.jpg
    313.2 KB · Views: 95
  • After Repair.JPG
    After Repair.JPG
    54.4 KB · Views: 92
Lu:
I saw the Dr. Laser repair and spoke to someone who had done it. Super involved and IMHO, not necessary. If you look at the pic below you will see that the after cockpit bulkhead is bonded to the liner in three places - the drain and at each corner. unless there is evidence of severe sagging of the sole, I would create three filets between the hull and the bulkhead out of thickened epoxy and then layer over it with woven roven. The second pic shows the first one I did. I was overkill with the limber holes, and by the time I did the second one, I did the three separate bonds to allow more water/air flow under the sole. Both boats are used extensively during the summer and haven't missed a beat.

Thanks for the pics. That is how I am going to do it as well. Bond the corners and drain hole area, then install new brass fitting and possibly an extra brass washer to help take up any oversize of the existing hole.
 
then install new brass fitting and possibly an extra brass washer to help take up any oversize of the existing hole.
If you can find a specialty hardware store that has brass fender washers, one could be modified at a machine shop to meet your requirements. the same could also be done with a stainless one.
 

Back
Top