The laser adventure

Ok guys here goes:

Splash!
I'm excited as hell!
I just jumped into the Laser deep end!
I have a back story here and will need some help with what I plan to do, you guys seem to be more than willing to help the newbies so I will give it a go.

My Goal:
I will be running a blog parallel to this thread that is intended to chronicle my attempt at fixing/reconditioning a 1991 laser. I will be running no ads on my blog, it's sole purpose is for others (like yourself) to comment on the best ways/means to address each next step with the hope that we can piece together a solid reference for anyone who is in the market for a used boat or someone who just needs to know the basics about gelcoat, fiberglass repair, delamination issues, adding upgrades or just the best way to make their old crap like new again.
I will be contacting Jim Meyer from Intensity Sails to chime in, as well as a local fiberglass/gelcoat/awlgrip specialist, Norm Bessette, from Bessette Marine Finishes. They will be able to legitimize my blog a bit I hope, and readers will know the info they are getting is not from 15 y/o kids but true professionals in the field.
I am sure all the info can be found on this site and that these things have been discussed ad nauseum, but what I want to do is put it all on a few pages with a ton of pics as I go step by step.

The boat's story:
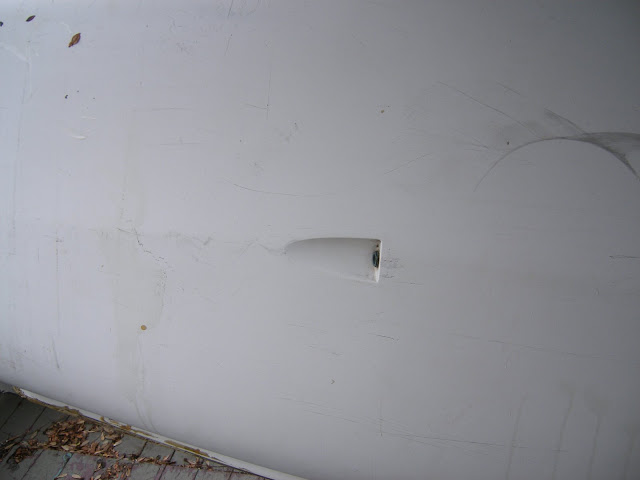
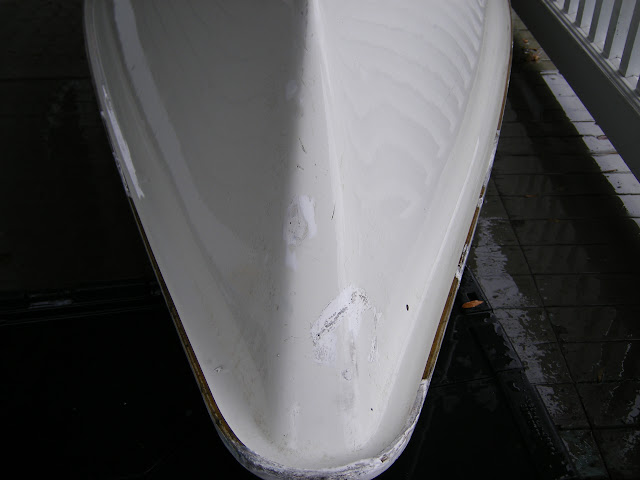
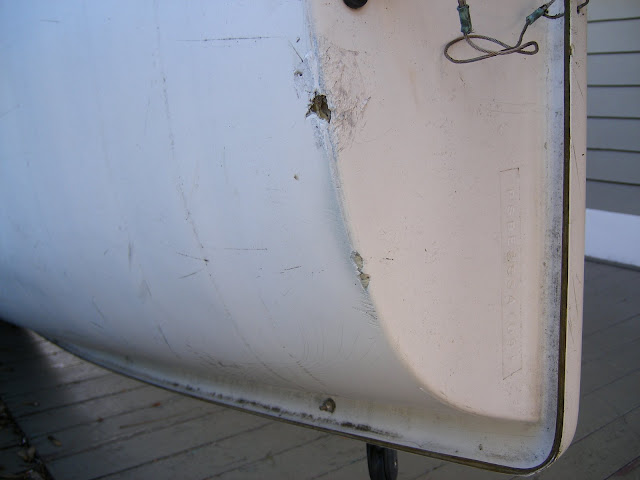
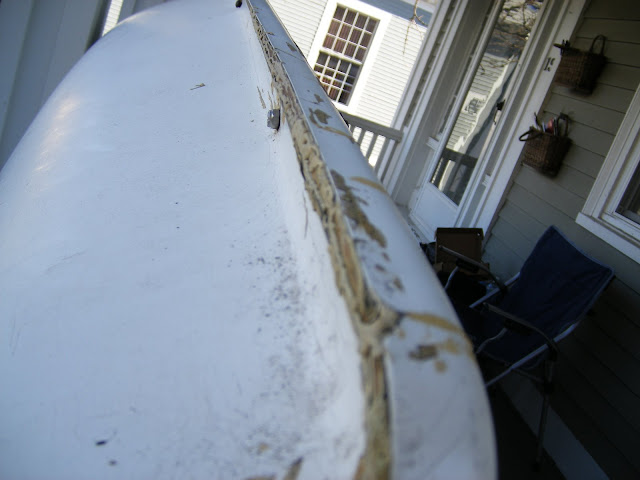
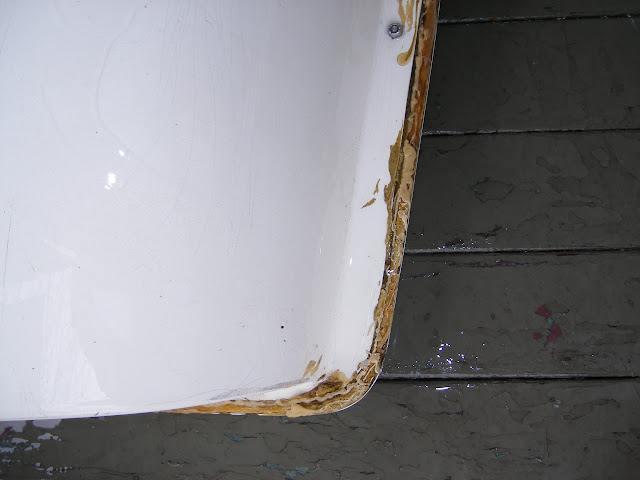
Norm Windus, coordinator/director for URI Sailing was kind enough to lend me a laser from his program for the price of fixing it up. It was a practice boat for the navy team that was donated to the college. It does have some issues that some would call serious, others maybe not so. Most likely, I will be dumping a good amount of money into this boat, which is ok because I will probably make Norm an offer to buy it outright when I'm done.

My story:
I come from bigger boat experience, my father owns a Pearson 26 in Bristol, RI which I pretty much learned on. I also learned on a Pearson 30, Nordic 34, and finally crewed for a summer on a 12 meter in Newport. All the while trying my hand at different boats, like J24's and the Melges 24. I guess I am doing this backwards but I want to become a much better sailor so now I need/must do the dinghy thing. So here I am in TLF. I also have extensive rigging/splicing experience, and I manage a West Marine store, so I guess you could say I am in a good position to start an endeavour like this.

I have never sailed a boat smaller than 24', so when I'm done fixing it, it will be time to learn how to use it.

Please visit my blog as I will be updating it all the time with pics, progress, and responding to comments that you have. If you have interest here, please bookmark this so you don't lose me in the forums.

The title is "THE LASER ADVENTURE" here on TLF.

Without further ado, here's the linky to the bloggy...

http://brennan-laserproject.blogspot.com/
 
Veri-nize... you will have at least one reader!

A lot of what you're doing parallels my projects - restoring a 1970 Sunfish while learning the Laser, which is next in line for the winter shop-work.

Which West Marine shop?
 
Ok, so the boat cleaned up better than I expected and I feel a bit more optimistic about the bottom work. After reading Gouvernail's very nice article "How to make your bottom pretty", I am wondering if I need to apply gelcoat at all. I have a lot of light scratches and spider stress cracks, a few scratches are probably as deep as a dime's thickness. I would like to have a really nice bottom so it resembles something new or close to it, no scratches or cracks when I'm done. What would your advice be?

Should I:
Start first with a rubbing compound, see what is left, and sand and fill accordingly with gelcoat?
or
Lightly sand first with a 400-600 grit to eliminate the light scratches and cracks?
or maybe
You have a better method...

Here are some pics taken right after the boat was cleaned, don't let the shine fool you it is still wet so it only LOOKS like a nice hull...
DSCF1324.JPG


DSCF1323.JPG


6.JPG
 
Just to add a bit of help....I just pressured my boat and found about 5 leaks and a cracked maststep in the process. Pressure testing saved me a bunch of time and the expense of a complete maststep kit. I repaired the step myself with West System, glass, and a properly placed porthole. the leaks were solved with a new bailer fitting (the brass piece) and some silicone.

To pressure test I found a cheap pump at Bennys and attached it to a spare porthole cover. Good thing is enough pressure to test for leaks, better thing the cheap pump does not have the power to over pressurize the hull and do damage. If you want I can figure a way to get it to you to use. I am in Portsmouth.
 
Great idea Beaker. I definitely will be pressure testing the hull when all is said and done, I even think I have a small pump for my inflatable kayak I can use. I am pretty certain I have some leaks. Check this out...
boat%20pics%202%20009.jpg


Is this just a West System epoxy fill? Suggestions?
 
the lower one would be a fill. I would use the high density for strength. The upper would need grinding away and cloth to restore structure.
 
Hello,

i looked at ure blog, funny, till a year ago i raced a boat that age, 143840, a Performance sailcraft europe. She was in really good shape actualy, but sold her for a good price and bought a 2001 boat. I looked at the pictures, your inside looks normal, the white plugs are the thingies that keeps your drainplug in the transom from falling out, looks like they lost a lot of them. The leak is most likely to come from the ding in the back. Looks like a boat that has been trough a lot, but is fixable.

Good luck on your project, i will be folowing ure blog.
 
I agree with beaker about the top one needing to be glassed. My question is since you already have to glass the one, it wouldn't be too much more work to go ahead and glass the other one too. as for the bottom, I put a thread on here about a year ago when I redid the bottoms of two boats. don't repray the whole bottom if you don't have to. It is a bunch of work and money. but if you do deside to, it does look great. Good luck.

Beaker, What PSI did you presurize the hull to. I have a leak that I would love to find When I get home.
 
Hello:

I checked out your blog and while you do have your work cut out for you, the boat looks salvageable. There were a few questions related to the pictures, and I will address a couple of the ones I remember.

1. As for the mast step, it is important enough that you should add an inspection port to the foredeck abeam of the tube. This way, you can check its condition and for leaks. To determine if the tube leaks, set the boat level and fill the step with water and mark the level with a grease pencil or non-permanent marker. Wait 24 hours and see if it drops. If it does, then the bottom forward half of the tube has been compromised. Below find a link to mast step repair information which also shows the location of the inspection port. You should also make sure there is a wear plate in the bottom of the step and add teflon wear tape to the mast. Both are available at APS.

http://www.schrothfiberglass.com/maststep.htm


2. As for other leaks, I don't recommend pressure ("hydro") testing the hull, but there are many who do. In your case, given the condition of the boat and number of "repairs", I would probably do it. Some people have used a vacuum with the hose attached to the exhaust side of the unit. As for the procedure, I have never done it, so I would defer to other members more experienced in this area.

3. From the pics of the hull and foredeck, I would recommend grinding off the scars from previous repair attempts, filling properly with marine-tex or thickened epoxy, fairing, prepping, and then painting with a good 2 part marine paint. 90% of this job will be prep work and sanding/fairing. You mentioned in your profile that you are in the maritime industry. Do you know someone at a boatyard who can spray it if you do all of the preparation? That is the way I would go.

4. This is a great project and a good learning experience. I learned a lot from my first one (link below).

http://www.laserforum.org/just-bought-1979-laser-t6507.html?t=6507&highlight=1979+laser

HTH, Good luck and keep the pics coming.
 
Thanks Bungo, that really did help a lot.
I agree, adding an inspection port would help, plus I have a gouge through the glass on the foredeck, I could just use that spot for the new port hole.

So, on the foredeck I will grind down the epoxy spots, refill with West System and probably 407 filler, fair down to deck level and repaint.

Bungo, you mention a 2 part paint? Is there any reason for the 2 part as opposed to a one part like Brightside (topside) paint from Interlux? Or what about just adding the white pigment that West Systems has, would this suffice? Another obvious question would be the gelcoat in these areas, do I need to restore this?

Anybody have any experience with these issues?

Here's what I'm dealing with:
Laser%20002.jpg
 
You'll omly need to re-gelcoat the spots on the foredeck, if your not going to paint them. Personally, your deck looks like it's in pretty good shape, I would just gelcoat the spots you are repairing. When you sand those spots down, just be mindful to keep it small. you don't want to end up having a big spot to gel coat if you don't have to.
As for the 2 part paint, I never had any luck with brightside, but have had friends that have. It's defintantly the more affordable way to go. I imagine if you have a good hand at roll and tip method, it'll work fine. I tried to spray it, and it didn't come out to well.

What are you going to do with the repair wear the deck meets the hull? Any clue what happened?
 
To save on sanding or polishing the gelcoat or epoxy filler, get some thin polyester film, and use it to flatten the filler down while its wet. just smooth it on and leave it there until the repair is dry. It wont stick, so you'll need to tape it in position.
remove any excess filler before it goes off.

when you peel the film off, the repair should be nice and smooth, without any sanding.
 
SGT, no idea what caused the issue between the deck and hull but I am dreading that part of the boat. For the rest of you here's what he's talking about:
Laser%20025.jpg


10.JPG

Yikes!!!
 
Thanks for the additional pics. As for the hull/deck joint, I can only imagine that someone suspected a leak and tried to seal it with some sort of glop (glop being a highly technical term). From the picture it actually looks wider than untouched joints I have sen, but that may be the camera. All I can say is grind, clean and repair. I would also look at another boat for guidance.

West with 4007 is good stuff to use and has superior adhesion. This is what all of my Mako resoration buddies use. As for the foredeck where the bow eye is, I would make every effort to not grind on the nonskid and try to chemically remove the spillage. This will make the repair look more presentable and professional when you're done.

Most of the powerboat restoration guys I know (the labor of love guys) use Interlux Perfection. Two-part polyurethane paints are exceptionally durable, and look like factory fresh gelcoat when you are done. Considering your line of work, I would try to find an individual of small outfit that does glass work and sprays 2 part paints. The ideal situation would be a major restoration or repair project where they are going to do some painting (white) in a month or two. The deal I would strike would be to prep the Laser myself, transport the boat to/from the facility, chip in some paint/consumables and labor on both projects as necessary, and have them spray your boat when they do the other one. For a laser, you are talking about a quart of paint at the most. Just a thought.
 
Go to James Freedman.com on the hull separation I think he has a good blog on
that. Like bongopete said the interlux is good. The first Laser I bought was a
73 with the blue and white and done by newbies that looked good.
 
Polyurethane Paints are Great. Defently agree with pete. You should be able to talk to any boatyard or friend in the business and get a good deal on some leftover paint if you want to do it yourself. I know when the end of the year can around, we had tons of leftovers from big jobs. a little goes a long way in those, and a quart would be able to do the whole thing. if you paint though, make sure you prime. don't know about perfection, We always used awlgrip.
 

Back
Top