cbr2wheelin
New Member
I am brand new to sailing. My dad came across a free sunfish which everything except rudder, centerboard, and tiller and gave it to me. I am making the centerboard and rudder from African mahogany and then the tiller from ash for only about $80. I needed to replace a few other small pieces of hardware and spend the next many evenings cleaning, polishing, repairing, installing, and enjoying the process.
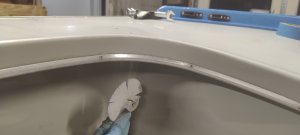
After scouring the internet, I was unable to locate any suction cup ends or ideas how to replace those suction cup ends on the traveller bar. When searching for wet/dry sanding paper this evening, I bumped into a Powertech rubber bar I have which is used for cleaning my belt sander. It is a bit softer than that old suction cup rubber, so I used a caliper to measure the maximum suction cup thickness (21mm) and cut the rubber bar. More compression should make up that difference. I was able to preserve the aluminum traveller bar inserts with the screws. I placed them through the brackets, added a new nut, used a drill press to drill out the proper depth of the rubber for the nut to fit into and compressed and slid everything into place. I think it should do the job!
I still have to add the hardware after polishing the top, but the images should give you an idea what the result will look like. Hopefully this will help someone else out down the road. Happy sailing.