Spray Coaming Clean-up and Install

Woodwind

Active Member
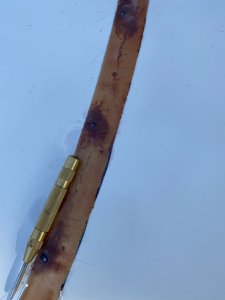
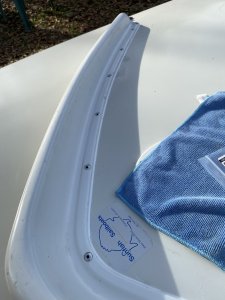
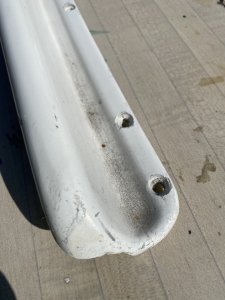
The spray coaming that came with this boat (not mounted) had ingrained “schmutz”.
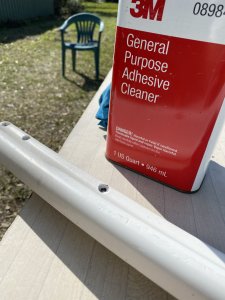
Found that the 3M adhesive cleaner cleaned it up the best .... with a little elbow grease.

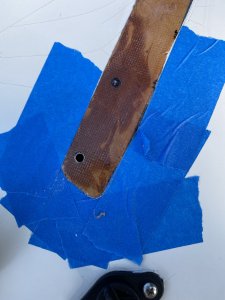
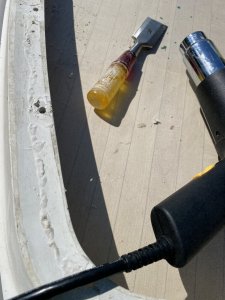
Used a heat gun to heat the old sealant on the concave underside and scraped off with a wood chisel.
 

Attachments

  • 3A877445-0FCE-4BA0-8FBB-596945BE8CE4.jpeg
    3A877445-0FCE-4BA0-8FBB-596945BE8CE4.jpeg
    789.5 KB · Views: 43
  • B1175F98-3881-443B-9DEF-CF0B5D21AD09.jpeg
    B1175F98-3881-443B-9DEF-CF0B5D21AD09.jpeg
    716.5 KB · Views: 43
  • AB749588-7617-410D-A5FC-4EB325D01627.jpeg
    AB749588-7617-410D-A5FC-4EB325D01627.jpeg
    793 KB · Views: 48
  • F097DDC5-DD2B-4271-A36C-D945FD0381C4.jpeg
    F097DDC5-DD2B-4271-A36C-D945FD0381C4.jpeg
    771.6 KB · Views: 38
Last edited:
Used a spring loaded hole set to mark new hole locations before pre-drilling rivet holes through cured West System 407 “putty” and fiberglass tape repair/renforcement.
I was concerned that the spring loaded hole set may stress crack fiberglass or gel coat, but it was nice and solid with the one layer of fiberglass tape over the 407 putty repair of the damaged deck.
I’ve had these spring loaded punches break ABS plastic parts in the past.

Drill gently without a lot of pressure and then release the trigger before pulling the bit out to get a good non-wallowed hole and a tight fit of the rivet.
When drilling, drill one end hole first, drop a rivet in, then work from the center or the point of the spray coaming back to one end, and then repeat for the other side.
This will help get the rivet holes positioned properly. Use closed bottom rivets.
 

Attachments

  • C1DD3F0C-29BA-4744-BB48-CC12D83C3A3B.jpeg
    C1DD3F0C-29BA-4744-BB48-CC12D83C3A3B.jpeg
    391.2 KB · Views: 47
  • D7AFC59E-AFC5-4E33-9BB3-D855AB97879C.jpeg
    D7AFC59E-AFC5-4E33-9BB3-D855AB97879C.jpeg
    824 KB · Views: 41
  • D2F43D19-19C5-40C9-9477-99B7BC348501.jpeg
    D2F43D19-19C5-40C9-9477-99B7BC348501.jpeg
    562.9 KB · Views: 39
  • C43672F8-4B77-4592-BCEC-DBC35E826246.jpeg
    C43672F8-4B77-4592-BCEC-DBC35E826246.jpeg
    410.2 KB · Views: 49
Last edited:
Maybe it was a strong wind that carried tiny wet epoxy resin droplets onto the deck. The droplets cured on the gelcoat. :(

So...I took a small squared-off punch and tack-hammer to knock those tiny lumps off the gelcoat. :cool:

Bad procedure! Each tiny lump was chipped away, carrying a tiny divot of gelcoat. :eek:

Not to self:
Don't do that any more...
 
Nice job and photo's. Did you use any 3m 4300 at the rivet holes before installing the rivets? I have seen that procedure on several posts.
 
Yes, dipped them In 3M 4200, used the dipped rivet end to spread a little around in the countersunk hole in the coaming and then pushed them through.
After setting the rivets with the rivet gun, wiped the tops of the rivets clean.

this is all prior to me cleaning the concave bottom of the spray coming and carefully buttering it with 3M 4200 And setting it in place.

I left a small gap at the outside edge to fill with silicone, as 4250 and 5200 both yellow with age.

That way if I need it I can pull the silicone and re-caulk that small bead back in.

Will get a pic and post hopefully today, it’s raining here today.
 
Here’s a picture of the bead of caulk at the inboard edge, this is just window dressing as the coaming is held on very securely with 3M 4200 and closed bottom rivets.

The coaming is slightly higher than the deck now that it has one layer of fiberglass tape under it. This is a bead of GE 100% White silicone.
Beware, I bought a tube of Gorilla and it’s very thin and runny and harder to control
The GE skins over surprisingly fast at the current temps here....70ish F.

So you’ll just see a bright white bead instead of yellowing 3M 4200 down the road.
 

Attachments

  • 474182B7-6FD5-4564-92ED-17F0803F7228.jpeg
    474182B7-6FD5-4564-92ED-17F0803F7228.jpeg
    779.3 KB · Views: 44
A coaming install followup

No need to do the aesthetic caulk bead at the end if you don’t put fiberglass tape down As the coaming will be the same height as the deck.
This has proven to be super strong I’ve been pounding the _ _ _ _ out of my Sunfish for a couple of weeks in these wonderful March winds. The spray coaming is on, it’s very secure using this method. No leaks, minimal weight gain.
PS closed bottom rivets are available at Bolt Depot. All the Sunfish parts suppliers were back ordered when I tried to order them.
 

Back
Top