minas man
Member
The symptom were hearing loose blocks when boat was being flipped, soft hull bottom and deck and hull very noisy with banging sounds when sailing in choppy conditions.
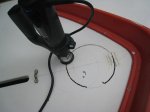
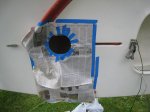
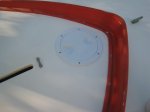
First cut 3 holes for 6 inch inspection ports but do not install ports until foam block repair is complete.

The 3 holes will be a the access points for the repair. You will need a good light source and I needed lot of spare bulbs.

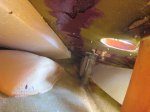
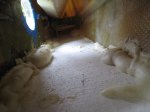
You can see the loose foam blocks. I had to scrape away lots of failed adhesive from the deck side only and then vacuum out the hull. I did not scrap out any foam that was still intact as it helped set the loose blocks in place if I were to remove it I would have needed a gallon kit instead of a 2 liter kit of 4 LBS two part urethane foam.

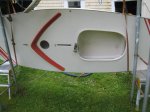
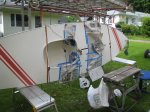
The 1980 hull in position to fix the loose foam blocks using gravity and flipping boat to the other side when needed.
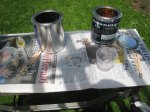
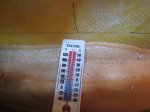
Get your foam ready and mark your tools so you do not cross contaminate. Consumables are gloves and your one time mix cups NO WAX cups and Tape to protect the gelcoat from the very sticky foam mix. Small batches about 1/2 cup in Total of the A + B. I mixed about 2o batches. The larger the batch the faster it will turn to foam. These 1/2 cup total A + B were having to be poured out in under 60 seconds at 70 degrees. Once the foam was all poured I used a hair dryer to heat the inside of the hull. I have more pictures but they are not uploading so I will post again to complete the fix.
Minas man

First cut 3 holes for 6 inch inspection ports but do not install ports until foam block repair is complete.
The 3 holes will be a the access points for the repair. You will need a good light source and I needed lot of spare bulbs.
You can see the loose foam blocks. I had to scrape away lots of failed adhesive from the deck side only and then vacuum out the hull. I did not scrap out any foam that was still intact as it helped set the loose blocks in place if I were to remove it I would have needed a gallon kit instead of a 2 liter kit of 4 LBS two part urethane foam.
The 1980 hull in position to fix the loose foam blocks using gravity and flipping boat to the other side when needed.
Get your foam ready and mark your tools so you do not cross contaminate. Consumables are gloves and your one time mix cups NO WAX cups and Tape to protect the gelcoat from the very sticky foam mix. Small batches about 1/2 cup in Total of the A + B. I mixed about 2o batches. The larger the batch the faster it will turn to foam. These 1/2 cup total A + B were having to be poured out in under 60 seconds at 70 degrees. Once the foam was all poured I used a hair dryer to heat the inside of the hull. I have more pictures but they are not uploading so I will post again to complete the fix.
Minas man