
steffenme1
New Member
Nose repair with epoxy and vacuum pump
My Sunfish has been taking on a terrifying amount of water the last few times I've taken it out. The culprit was primarily a crack in the keel just under an improperly adjusted trailer roller; I neglected to take a single photo of that repair.
But wait!
While leak checking the boat I also found a smaller leak at the bow and I did manage to snap a few photos of the process I used.
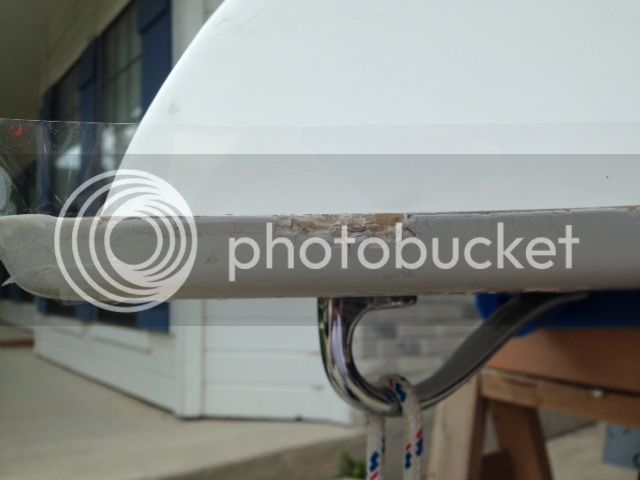
Here's the Starboard side crack to repair, in this photo I've already used a dremel to carve out a section for filling. You can also see I’ve already filled and sanded the port side.

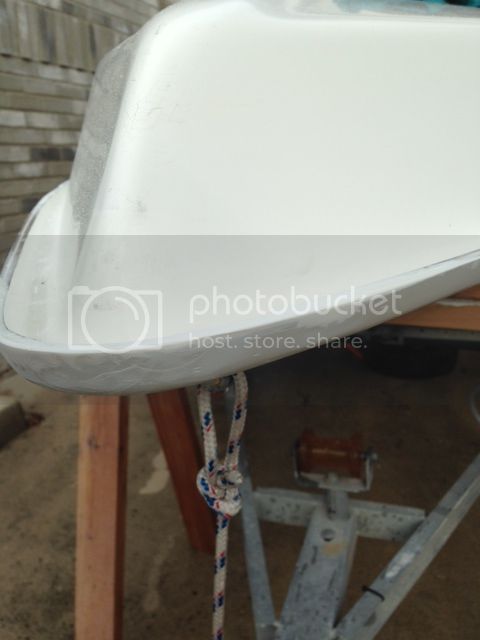
I also decided to try and fill this chunk of rail and a few more on the nose that were knocked off in some unknown ballyhoo by the boat’s previous owner; you can also see a piece of packing tape being used as a backer to keep the epoxy where I needed it. Packing tape is amazing at being un-stickable to epoxy. (un-stickable is likely not a word)
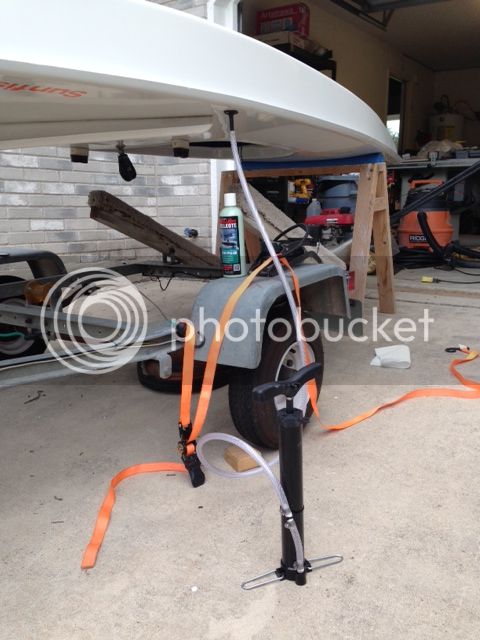
In these series of repairs I decided to use a vacuum pump to help draw the epoxy into the repair areas, I used a modified bicycle pump with a new check valve installed and the plunger flipped; you can see it here hooked up with a valve stem with it’s schrader valve removed.
The pour:


The next day it was sanded (sorry for the crappy contrast)

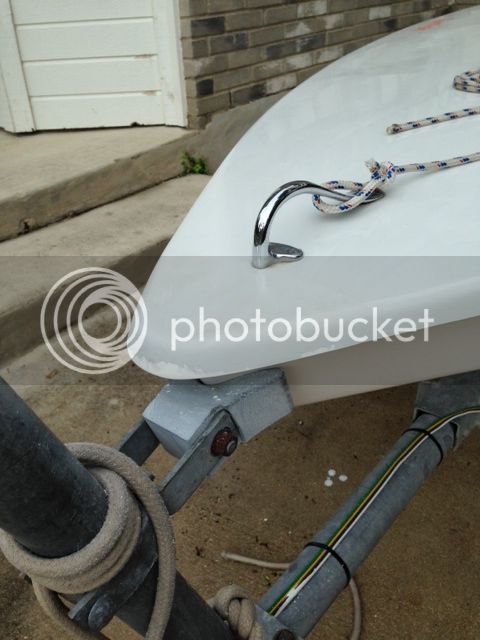
Flipped over to show the extent of the nose repair.
I didn’t bother trying to match the white of the boat with the epoxy, I was more concerned with the water ingress and I figure it still looks better than a nasty chunk of exposed fiberglass. I understand that epoxy by itself is not UV resistant but I have no immediate plans to gelcoat these repairs, the addition of pigment to the epoxy will help with UV resistance somewhat but the boat is always under cover and if I get more than a few years out of the repairs I’ll be perfectly content.
My Sunfish has been taking on a terrifying amount of water the last few times I've taken it out. The culprit was primarily a crack in the keel just under an improperly adjusted trailer roller; I neglected to take a single photo of that repair.
But wait!
While leak checking the boat I also found a smaller leak at the bow and I did manage to snap a few photos of the process I used.
Here's the Starboard side crack to repair, in this photo I've already used a dremel to carve out a section for filling. You can also see I’ve already filled and sanded the port side.

I also decided to try and fill this chunk of rail and a few more on the nose that were knocked off in some unknown ballyhoo by the boat’s previous owner; you can also see a piece of packing tape being used as a backer to keep the epoxy where I needed it. Packing tape is amazing at being un-stickable to epoxy. (un-stickable is likely not a word)

In these series of repairs I decided to use a vacuum pump to help draw the epoxy into the repair areas, I used a modified bicycle pump with a new check valve installed and the plunger flipped; you can see it here hooked up with a valve stem with it’s schrader valve removed.

The pour:


The next day it was sanded (sorry for the crappy contrast)


Flipped over to show the extent of the nose repair.

I didn’t bother trying to match the white of the boat with the epoxy, I was more concerned with the water ingress and I figure it still looks better than a nasty chunk of exposed fiberglass. I understand that epoxy by itself is not UV resistant but I have no immediate plans to gelcoat these repairs, the addition of pigment to the epoxy will help with UV resistance somewhat but the boat is always under cover and if I get more than a few years out of the repairs I’ll be perfectly content.