
CaptainLarry
Active Member
At the request of Signal Charlie, I'll start a thread on my repair. Reference: Old Style Rudder - Lower Plate Attachment
Notice I'm not calling it a restoration. Restoration would imply that I have a deep passion for this project. Honestly I just want to get the boat working so my kids and I can go sailing. This opportunity just presented itself for $40 (I gave him $80) - trailer included. So, where I could have found a shorter route to the water, I am a sucker for fixing stuff - even when I don't know what I'm doing. Bear in mind I'm running an expense report, too. So no hiding expenses on this little distraction. I'm up to $350 already! So here goes.
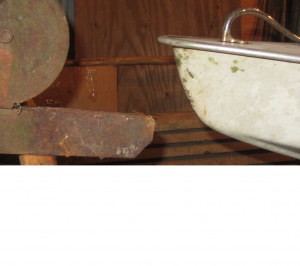
Ours (un-named) is a 1970, old style rudder type, with what appears to be little actual use. The damage is from sitting unloved in the weather and from the improper trailer. We weighed it at 195 pounds. Signal Charlie did a comprehensive (and amusing) analysis to indicate she is full of 8.33 pounds of water. I bet it could be more than that even. I thought dry weight was 120. I'll start in the next week or two to cut two inspection ports and try drying and replacing backer blocks for the old tiller parts. I guess this model pre-dates the said "cheeseburger" foam. I also need to decide how to fix the keel damage caused by the trailering. So I'll get some photos on that soon.
I will show the bow damage. Gel coat repair kit will handle that, I think? I want to change her color eventually too. The 1970-yellow coaming makes me dizzy. We'll do that later...LATER!
The most pressing issue is the inspection port locations. I'll search it out, unless someone wants to just give me dimensions. 12-14" forward of the stern (5"), and centered between the dagger board and the name plate (6")? Can I reach the fairlead backer block from that location, I doubt it.
Welcome aboard.
Larry
Notice I'm not calling it a restoration. Restoration would imply that I have a deep passion for this project. Honestly I just want to get the boat working so my kids and I can go sailing. This opportunity just presented itself for $40 (I gave him $80) - trailer included. So, where I could have found a shorter route to the water, I am a sucker for fixing stuff - even when I don't know what I'm doing. Bear in mind I'm running an expense report, too. So no hiding expenses on this little distraction. I'm up to $350 already! So here goes.
Ours (un-named) is a 1970, old style rudder type, with what appears to be little actual use. The damage is from sitting unloved in the weather and from the improper trailer. We weighed it at 195 pounds. Signal Charlie did a comprehensive (and amusing) analysis to indicate she is full of 8.33 pounds of water. I bet it could be more than that even. I thought dry weight was 120. I'll start in the next week or two to cut two inspection ports and try drying and replacing backer blocks for the old tiller parts. I guess this model pre-dates the said "cheeseburger" foam. I also need to decide how to fix the keel damage caused by the trailering. So I'll get some photos on that soon.
I will show the bow damage. Gel coat repair kit will handle that, I think? I want to change her color eventually too. The 1970-yellow coaming makes me dizzy. We'll do that later...LATER!
The most pressing issue is the inspection port locations. I'll search it out, unless someone wants to just give me dimensions. 12-14" forward of the stern (5"), and centered between the dagger board and the name plate (6")? Can I reach the fairlead backer block from that location, I doubt it.
Welcome aboard.
Larry
| Price | Notes |
80 | Asking price $40, paid him $80, includes trailer. |
50 | New rigging - Complete: Halyard, Main Sheet, Outhauls, Bungee |
50 | Missing Bronze hardware |
40 | One or two inspection ports $20 each |
2.72 | Drain plug |
40 | Gel Coat for the front bow damage? Spectrum color patch paste |
13 | 42/5200 Marine Sealant |
26 | Buffing Compound - Buff Magic |
26 | 1/4"-20 8" Bronze Bolt with wing nut and washer. #12 x 1-1/4" Screw |
15 | Rudder tube - white nylon tube is 1/4" ID x 1/2" OD x 5 1/4" |
342.72 |

")

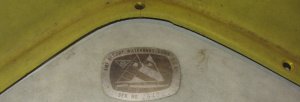
 (Of course this is after the structural....Later...later...) I'm happy with just the number plate.
")
