
andyatos
Well-Known Member
Been restoring a fairly neglected Sunfish (her new name is "The Betty") with current emphasis on eliminating the last few leaks. While my brother was sailing in the last video at Benicia, a steady supply of water was making its way to the splashguard and leaking through improperly sealed screw and bolt holes that were holding down the splashguard.
This morning I removed the splashguard... which took some doing because last time it had been mounted to the deck, someone used some pretty strong sealant under it. So strong in fact it pulled some of the glass right out of the deck. See the photo below.

I plan on drilling out then sealing the old holes with West Systems Six 10 then remounting the slashguard just a bit forward or aft of its current position (it was last mounted cockeyed... not symmetrically to the boat). I'll use rivets to remount the splashguard.
So, here are my questions.
1) What should I use to fill the low spots created by the adhesive pulling out sections of the glass on the deck? Pettit EZ Fair? The depth of glass that was removed was minor. Not very deep at all.
2) When it comes to sealing the rivet holes, what should I use as a sealant and what steps/process do you suggest? I was thinking it might go something like this. Put a blob of sealant around each hole, carefully lay the splashguard in place lined up over all the holes. Then use 3 un-riveted-rivets at the 3 "corners" to hold the splashguard in place, rivet all the other holes and finish up by doing the last 3 rivets in the corners. Something like that?
3) I'm assuming that I only need to use sealant around the holes. Ie, I don't need to run a bead of sealant along the entire length of the underside of the splashguard, correct?
4) Should I used aluminum or stainless rivets? I would assume aluminum... as there isn't the issue of strength being needed.
5) I'm going to mount the splashguard only about an inch forward or aft of its current position. Will that matter structurally? Any suggested forward or aft preferences?
Thanks,
- Andy
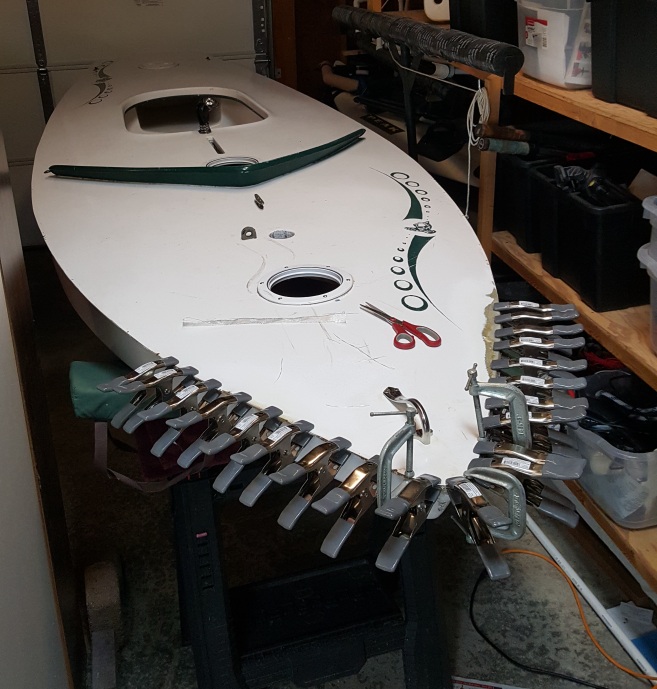
P.S. Here's another photo after having to re-build the bow area on The Betty (previous owners must have had a thing for ramming docks and other objects at high speed), replacing backing blocks then resealing the deck to the hull. Definitely has gone from initial annoyance at finding more stuff wrong/busted/WTF on the old girl to a labor of love. As it should be.
This morning I removed the splashguard... which took some doing because last time it had been mounted to the deck, someone used some pretty strong sealant under it. So strong in fact it pulled some of the glass right out of the deck. See the photo below.
I plan on drilling out then sealing the old holes with West Systems Six 10 then remounting the slashguard just a bit forward or aft of its current position (it was last mounted cockeyed... not symmetrically to the boat). I'll use rivets to remount the splashguard.
So, here are my questions.
1) What should I use to fill the low spots created by the adhesive pulling out sections of the glass on the deck? Pettit EZ Fair? The depth of glass that was removed was minor. Not very deep at all.
2) When it comes to sealing the rivet holes, what should I use as a sealant and what steps/process do you suggest? I was thinking it might go something like this. Put a blob of sealant around each hole, carefully lay the splashguard in place lined up over all the holes. Then use 3 un-riveted-rivets at the 3 "corners" to hold the splashguard in place, rivet all the other holes and finish up by doing the last 3 rivets in the corners. Something like that?
3) I'm assuming that I only need to use sealant around the holes. Ie, I don't need to run a bead of sealant along the entire length of the underside of the splashguard, correct?
4) Should I used aluminum or stainless rivets? I would assume aluminum... as there isn't the issue of strength being needed.
5) I'm going to mount the splashguard only about an inch forward or aft of its current position. Will that matter structurally? Any suggested forward or aft preferences?
Thanks,
- Andy
P.S. Here's another photo after having to re-build the bow area on The Betty (previous owners must have had a thing for ramming docks and other objects at high speed), replacing backing blocks then resealing the deck to the hull. Definitely has gone from initial annoyance at finding more stuff wrong/busted/WTF on the old girl to a labor of love. As it should be.

") Put the sealant around the holes, put the spashguard in place and also put a little sealant on the rivet barrel before it goes in.
Put the sealant around the holes, put the spashguard in place and also put a little sealant on the rivet barrel before it goes in.