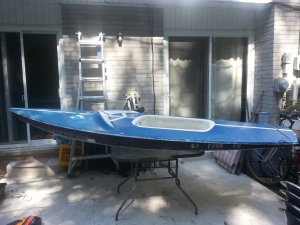
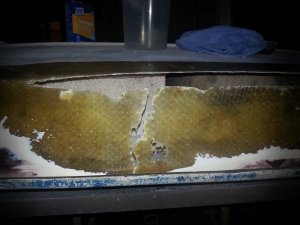
I just bought a minifish sailboat for $10 and it obviously needs some repairs. This is my first boat and first time working with fiberglass. It has structural damage on the hull on starboard and port. It is fairly extensive. The problem I'm running in to is I can't figure it what to use or how to put in a backing so I can layup the fiberglass. Any advice is welcome.
Navigation
Install the app
How to install the app on iOS
Follow along with the video below to see how to install our site as a web app on your home screen.

Note: This feature currently requires accessing the site using the built-in Safari browser.
More options
You are using an out of date browser. It may not display this or other websites correctly.
You should upgrade or use an alternative browser.
You should upgrade or use an alternative browser.
Minifish structural repair
- Thread starter KRitten
- Start date
I recommend reading/studying Signal Charlie's posts (this Forum) on the many boats that he has fixed up.
As an aside, I reckon he wouldn't mind you buying his 'repair' book (it's on he Amazon site).
As an aside, I reckon he wouldn't mind you buying his 'repair' book (it's on he Amazon site).
Kritten
Wow....and I mean wow.....you can lay some wax paper over the hull and form a patch about one inch larger than the size of the hole with fiberglass woven roving and epoxy resin. If you can't find roving use 3-4 layers of 6 or 8 oz cloth. Make the patch on the outside of the hull first using the wax paper to keep it from sticking, then when it dries you can slip it inside the hull and pull it tight with wires or strings.
Another method is to decide if you can access that area from inside the cockpit through 1-2 inspection ports. The woven roving is thick and would hold its shape pretty well while it dries. There are lots of folks in the forum who have done cockpit inspection ports on Minifish, hopefully they'll chime in with ideas.
Scroll throughout this thread for ideas: http://sailingforums.com/threads/sunfish-pickin-pensacola.28698/
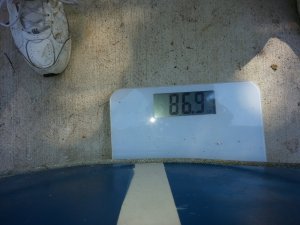
How's the weight on the hull, it should be 75 pounds. You might need inspection ports for that also.
Let us know how it is going and thanks for the pictures!
kent
Wow....and I mean wow.....you can lay some wax paper over the hull and form a patch about one inch larger than the size of the hole with fiberglass woven roving and epoxy resin. If you can't find roving use 3-4 layers of 6 or 8 oz cloth. Make the patch on the outside of the hull first using the wax paper to keep it from sticking, then when it dries you can slip it inside the hull and pull it tight with wires or strings.
Another method is to decide if you can access that area from inside the cockpit through 1-2 inspection ports. The woven roving is thick and would hold its shape pretty well while it dries. There are lots of folks in the forum who have done cockpit inspection ports on Minifish, hopefully they'll chime in with ideas.
Scroll throughout this thread for ideas: http://sailingforums.com/threads/sunfish-pickin-pensacola.28698/
How's the weight on the hull, it should be 75 pounds. You might need inspection ports for that also.
Let us know how it is going and thanks for the pictures!
kent
First part of fiberglass repair.... not good lol
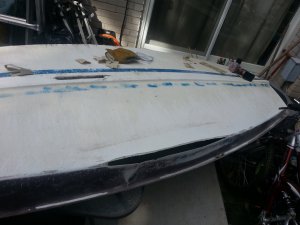
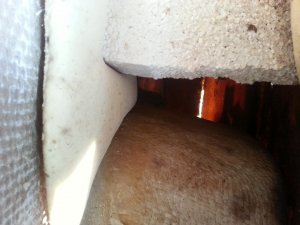
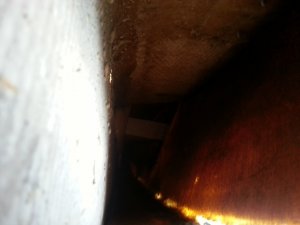
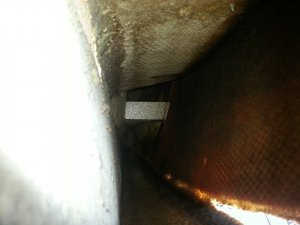
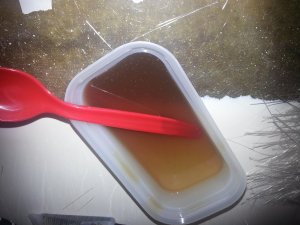
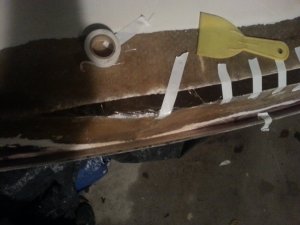
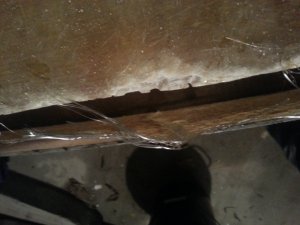
I weighed the hull it was 86.9 so a little heavier than what was mentioned. I included pictures of the interior because I have no idea what its supposed to look like.
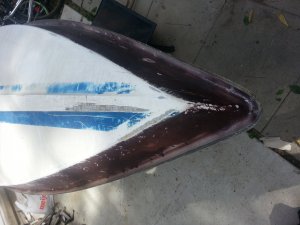
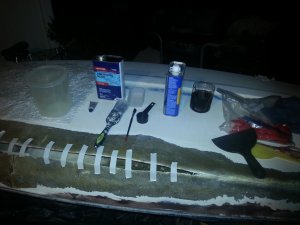
The next couple of pictures are of my attempts at a repair. I only have an orbital sander that i'm burrowing from a friend and a black and decker mouse sander. So I started sanding off the gel coat which is a complete pain in the ass. Is there any easier way to remove it?
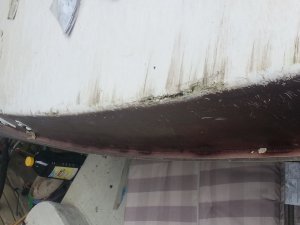
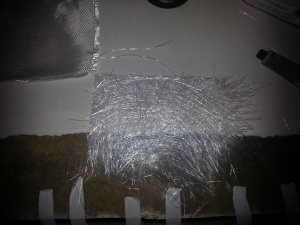
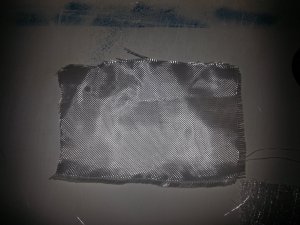
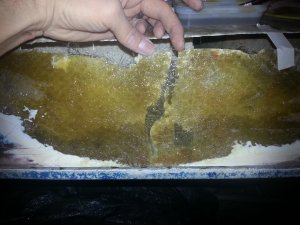
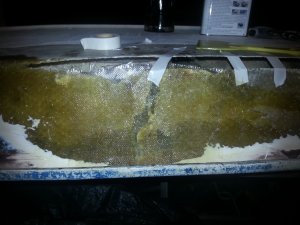
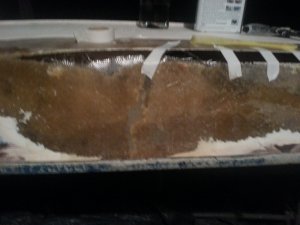
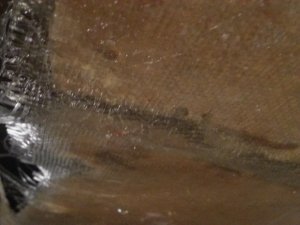
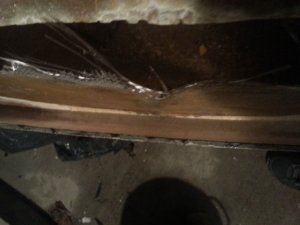
After I finished sanding I cleaned the area with acetone until there were no streaks and nothing showed up on my rag when I wiped it down. When I was getting everything ready I noticed the side bowed out so I thought it would be a good idea to tape it in order to keep the right curve. Then I prepped the mat, cloth and epoxy. With hindsight I'm pretty sure I didn't add enough hardener, I used 2oz of epoxy and 16 drops of hardener per the instructions. Next I brushed on the epoxy laid down the mat and brushed some more epoxy on top of that. Then I smoothed it out or w.e. with a straight edge/ plastic putty knife. Then I realized the tape was coming off so I tried holding it with my hands... that didnt work. I ended up with a bump/bubble over the crack.
Any suggestions on my next attempt?
My plan is to sand it down again and drill some small holes in the edge of both sides and tie it together instead of tape in order to keep the right shape while I work on the side.
I weighed the hull it was 86.9 so a little heavier than what was mentioned. I included pictures of the interior because I have no idea what its supposed to look like.
The next couple of pictures are of my attempts at a repair. I only have an orbital sander that i'm burrowing from a friend and a black and decker mouse sander. So I started sanding off the gel coat which is a complete pain in the ass. Is there any easier way to remove it?
After I finished sanding I cleaned the area with acetone until there were no streaks and nothing showed up on my rag when I wiped it down. When I was getting everything ready I noticed the side bowed out so I thought it would be a good idea to tape it in order to keep the right curve. Then I prepped the mat, cloth and epoxy. With hindsight I'm pretty sure I didn't add enough hardener, I used 2oz of epoxy and 16 drops of hardener per the instructions. Next I brushed on the epoxy laid down the mat and brushed some more epoxy on top of that. Then I smoothed it out or w.e. with a straight edge/ plastic putty knife. Then I realized the tape was coming off so I tried holding it with my hands... that didnt work. I ended up with a bump/bubble over the crack.
Any suggestions on my next attempt?
My plan is to sand it down again and drill some small holes in the edge of both sides and tie it together instead of tape in order to keep the right shape while I work on the side.
Attachments
-
 20140920_110915.jpg293.3 KB · Views: 52
 -
 20140920_110940.jpg172.8 KB · Views: 47
 -
 20140920_110953.jpg196 KB · Views: 40
 -
 20140924_154009.jpg452.1 KB · Views: 42
 -
 20140924_154246.jpg502.1 KB · Views: 43
 -
 20140925_194408.jpg332.1 KB · Views: 38
 -
 20140925_194419.jpg338.4 KB · Views: 45
 -
 20140925_195254.jpg237.8 KB · Views: 47
 -
 20140925_201022.jpg284.6 KB · Views: 40
 -
 20140925_201637.jpg484.2 KB · Views: 38
 -
 20140925_201642.jpg559.4 KB · Views: 38
 -
 20140925_202040.jpg391.9 KB · Views: 38
 -
 20140925_202925.jpg438.8 KB · Views: 43
 -
 20140925_204101.jpg357.4 KB · Views: 39
 -
 20140925_204105.jpg272.2 KB · Views: 41
 -
 20140925_204115.jpg299.5 KB · Views: 34
 -
 20140925_210047.jpg300.2 KB · Views: 39
 -
 20140925_210111.jpg259 KB · Views: 39
 -
 20140925_210120.jpg266 KB · Views: 37
L&VW
Well-Known Member
Any suggestions on my next attempt?
My plan is to sand it down again and drill some small holes in the edge of both sides and tie it together instead of tape in order to keep the right shape while I work on the side.
I had a similar problem in a Tornado catamaran hull. First, I had no access to the hull's interior's damage, so I cut a 12-inch circle from the inside of the two hulls. (And sealed it back up after the repair). Elsewhere, I used fine copper wire to "stitch" the panels together, did the repair, then sanded through the wires in order to finish the outside repair.
OTOH, "Gaffer's Tape" is a strong tape, that when removed, doesn't leave any tape residue.
Using the outside of the hull as a mold works (worked), but the resulting panel should be well sanded.